Multi-Channel Audio Editing with WavePad Audio Editor

You have been asking for separate channel audio editing and we have been listening. We are excited to announce that WavePad Audio Editor is now capable of performing sperate edits to individual audio channels in your multi-channel audio files. Not only is the new feature a fun and exciting way to step up your audio editing game, but it is also easy and simple to learn. Being able to edit and make adjustments to the separate channels in a multi-channel audio file is an important task in audio and sound editing. Not all edits are applicable for all channels in a file so being able to edit them individually can help you achieve a higher level of professional sound quality.
Open your Audio File in WavePad
Open your audio file in WavePad Audio Editor by clicking on the Open icon in the main menu and selecting the option that says Open File. This will launch the file finder window where you can choose the file with multiple channels that you wish to edit and bring it into the program. Select your file and then click Open to bring the file into WavePad.Show Different Channels
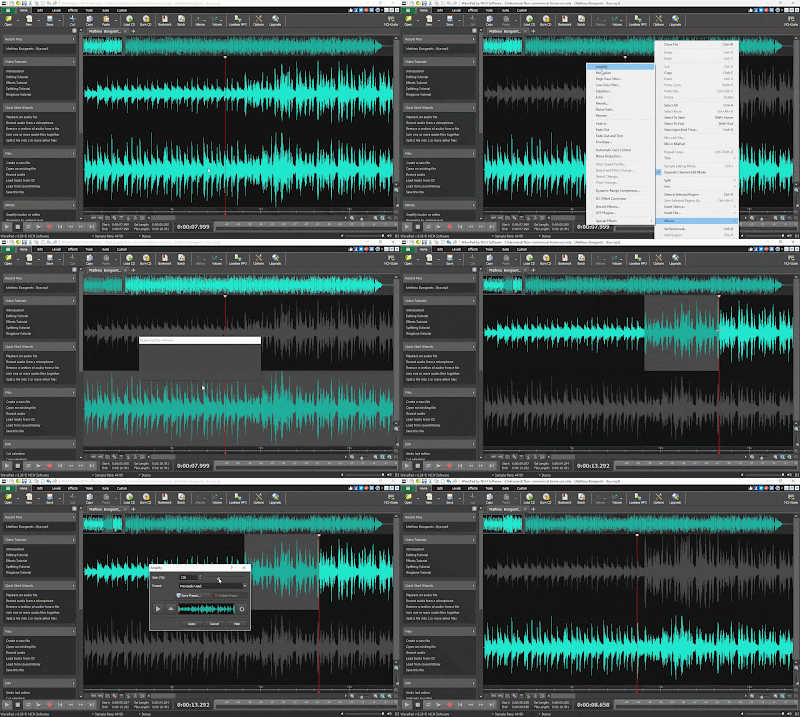
Beneath your waveform on the left-hand side, locate the Show Different Channels Separately button. Click on this button to show the separate channels in your multi-channel audio file. Stereo is generally the most common, which will display two channels. At this point, all edits made will still be applied to both channels, but now the separate channels in the track are visible.Separate Channel Editing
In the same toolbar, you will also find the option to enable separate channel editing. Your first few uses, a bubble tip will point out the Separate Channel Editing button. Click the Separate channel editing button to enable separate channel editing mode. Select the channel you wish to edit by clicking on its waveform and editing it as usual. The active channel will be colored and the inactive waveforms will turn gray. To edit all channels simultaneously, click the Separate Channel Editing button again to disable it.Editing Audio Channels Separately
 Now that you have enabled separate channel editing, you can make typical edits to each channel individually. Select a channel to activate it and then choose from a variety of the audio editing options available in WavePad. You can normalize the audio and adjust the gain of just one channel and then perform different edits on another channel. If you wish to edit only a portion of one channel, simply click on the waveform of the channel you wish and drag the cursor to select only a portion of it.
Export Multi-Channel Audio Files
Once you are finished editing the separate channels of your audio, you can then export your new audio file however you would like. From the main menu, select File and choose Save File As... to save your multi-channel audio file in a variety of popular formats. You can also burn your file to a disk or upload it directly to the cloud.For more on audio editing, check out these posts:


Cody - you might consider mentioning that this is only for Windows. WHen will it actually be available for Mac?
ReplyDelete