How to Make a Picture Collage
PhotoPad Collage Editor
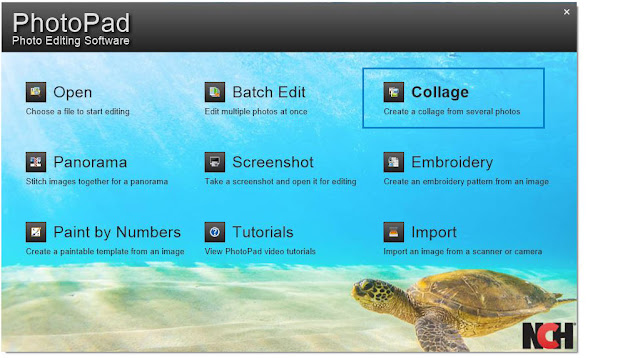
Launch the PhotoPad application on your computer. On the first window that opens, you will see a variety of different PhotoPad project types. Click on the option that says Collage to launch the PhotoPad Collage Editor.
Add Photos
The first step in learning how to make a picture collage is to add your images into the PhotoPad Collage Editor. Click on the Add Images...button on the bottom right-hand side of the Collage Editor window. This will open the file finder window so that you can locate and import your pictures into the program. You can also drag and drop images directly onto your collage to add them.
Adjust Canvas Size
Next, you will want to adjust your canvas size to determine the size of your collage. Under the Canvas Options tab, you can set the final output dimensions of your entire collage. You can choose from a variety of standard image sizes for both print and web. Try using 5 x 7 inches to create a postcard with your collage, or make it 8 x 10 inches for printing in a common photo frame size.
Background
Under the Background Options tab, you can select a background for your collage. Select the solid color option and then click on the Background Color bar to launch the Edit Colors window. You can then select and edit a solid color to be applied to your entire background. You can also choose from one of the many background textures/images in the collage editor to add a more exciting background to your picture collage.
Select a Layout
The PhotoPad collage editor comes loaded with over 30 different layout options. You can rearrange your photos within the layout by clicking on an image and dragging it to the position where you would like it. This will cause this image to swap places with the photo that is in that spot. Select the Free-Form layout option if you would like complete control over the size and positioning of your photos.
 Layout Options
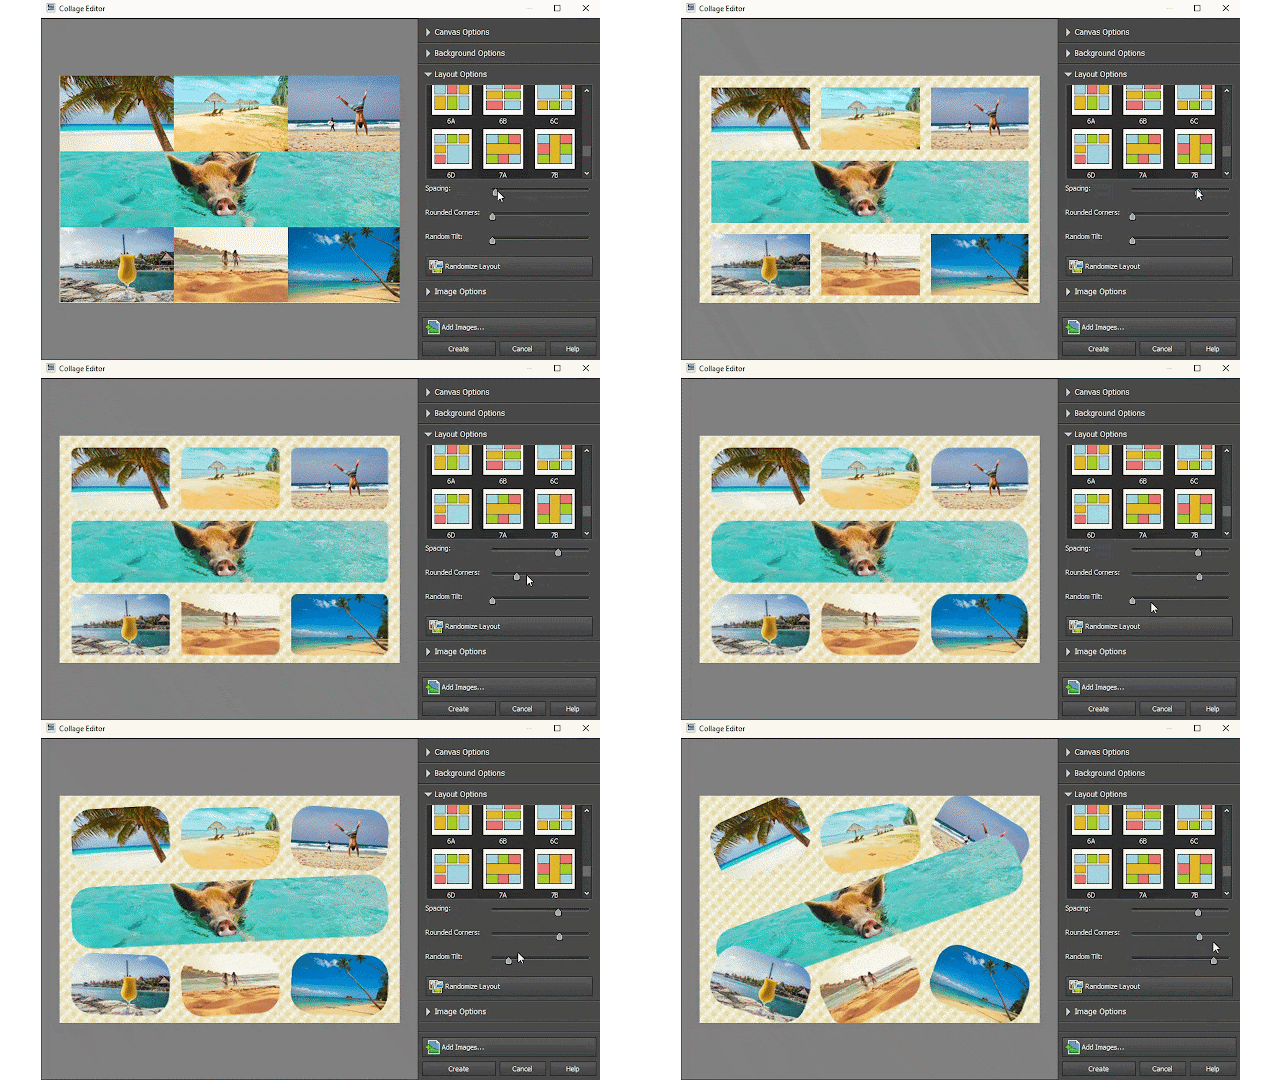
Once you have selected your layout, you can make further changes to the layout style by using the layout options adjustments. Drag the Spacing slider to adjust the spacing or padding between the pictures in your collage. Use the Rounded Corners slider to give the images in your collage the effect of a rounded corner. The Random Tilt slider allows you to make your collage look a little more fun and less organized by randomly tilting your images. Click on the Randomize Layout button to reshuffle the order of your images in the layout.

Image Options
Under the Image Options tab, you can remove and replace the pictures in your collage. Select an image and then click on the Remove Image button to remove that image. Then click on the empty space to launch the file finder window and find a new picture to take its place. The Move Forward and Move Back buttons can be used to adjust the layering order of your photos for layout styles that have overlapping images.Create Your Collage
Once you are finished making your collage, click on the Create button at the bottom of the program. This will bring your finished collage into the regular PhotoPad Photo Editing application. Here you can add text or apply any additional effects that you may want. When you are ready to export your finished product, simply click on the File tab and select Save As...from the drop-down menu. Name your file, set your file type and output destination, and then click Save. Your new and eye-catching photo collage is now finished and ready for use.For more on photo editing, check out these similar posts:


No comments:
Post a Comment