How to Edit an Audio File and Change it to MP3
The MP3 audio file format is the most commonly used format for sound today. MP3s are the preferred file type for sending and receiving audio files as well as storing them on discs and devices. Learning how to change an audio file to MP3 will provide you with virtually unlimited sharing and storing possibilities for your music and audio files. With a simple audio editing software such as WavePad Audio Editing Software you can easily learn how to edit audio files and save audio as MP3.
Import Audio
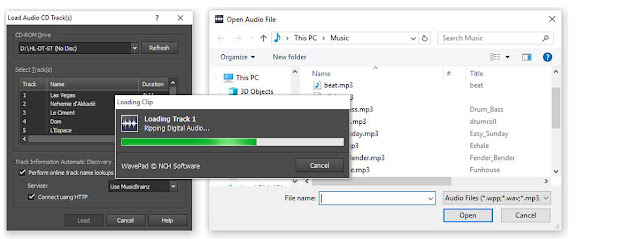
To begin editing audio files to export as MP3, you will first have to import those files into WavePad. You can add files to a WavePad project directly from a disc, from your computer or external drive, from the NCH Sound Library or you can record audio directly into the program.
Edit Audio
Before changing audio to MP3, you may first want to edit your music or sound file. Click on the Edit tab in the main toolbar to view the options for editing your audio files in WavePad. From here you can perform basic audio editing such as splitting and trimming clips, removing silences, mixing audio files, and performing general audio file cleanup.Adjust Audio Levels
Adjusting audio levels is something both seasoned music producers and beginners alike can quickly accomplish in WavePad. Adjusting audio levels will allow you to clean up and improve the sound quality of audio files. Click on the Levels tab in the main tool bar to view the different options for adjusting audio levels. Use the Noise Reduction feature to eliminate any unwanted background noise in your audio. You can also use the Amplify function to increase the sound volume or the Normalize function to further optimize the overall sound quality.Apply Effects
WavePad comes loaded with a variety of exciting and useful audio editing effects that you can use on your files. Choose from a list of classic effects such as Reverb, Chorus, and Echo or experiment with the many other effects available such as the Voice Changer. WavePad even allows you to combine and layer effects over each other to in order to create your own unique and original sound effect.Use Tools
Make use of the many tools available in WavePad while you learn how to edit audio files and save them as MP3. Use the Surround Sound Editor to edit and apply a surround sound effect to your audio for playback with a surround sound system. The Batch Converter Tool allows you to add multiple files for editing and converting all at once within your project. You can access the NCH Sound Library from the Tools tab and access a library of free sound effects and audio samples to use in your audio editing project.Save as MP3
Now that you have successfully learned how to edit an audio file with WavePad, you are ready to learn how to change audio files to MP3. Click on the Home tab in the main toolbar and then click on the drop down arrow next to the Save button. Here you can select the option that says Save File As... to launch the file finder window. Select your preferred output destination and name the file what you would like. Then click on the drop down menu that says Save as File Type and choose the option MPEG Layer-3. This is just a longer way of saying "MP3." Once you click Save, your newly edited audio file will appear as an MP3 in your chosen output folder.For more on audio editing, checkout these posts:
- How to Make Beats Using the MixPad Beat Maker
- How to Edit Audio Files with WavePad
- Navigate Speech in WavePad
- How To Record Instrumental and Vocal Tracks with MixPad MultiTrack Mixer
- How To Record Instrumental and Vocal Tracks with MixPad MultiTrack Mixer
- How to Record Streaming Audio
- How to Edit MP3 Tags and Metadata with Switch Audio Converter


No comments:
Post a Comment