Showing posts with label MP3. Show all posts

Friday, May 24, 2019

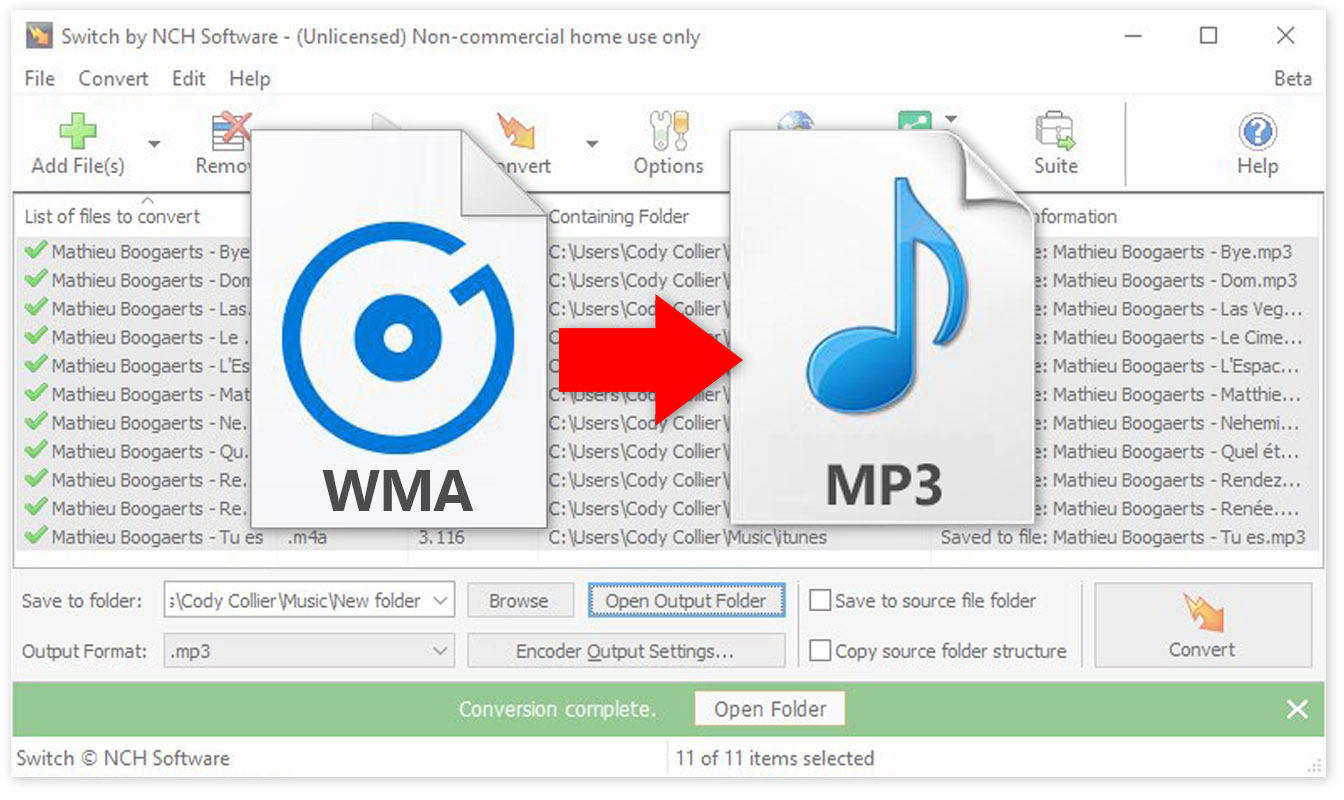
How to Change WMA to MP3 with Switch Audio Converter

How to Change WMA to MP3 with Switch Audio Converter


Windows Media Audio files, or WMA files, are a common audio file format, primarily meant to be opened and played on Windows Media Player and other Microsoft audio players. You can play WMA files with some other third-party software, but many audio players and devices (iPhone) will not support them. That is why it is useful to know how to change WMA to MP3. MP3 files are a much more commonly supported file type and are arguably a superior format anyways. You can easily change WMA files to MP3 format with an audio file conversion program such as Switch WMA File Converter Software.


Download Switch

Download Switch Audio File Converter software. Follow the installation instructions and launch the program on your computer.
Download Switch Audio File Conversion Software

Import WMA Files

Click on the green Add File(s) button located in the main toolbar to open the file finder window. Find and select the WMA files on your computer and click Open to bring them into Switch to convert them to MP3 format. You can also drag and drop WMA files directly into the program to change.
Import WMA files to Change them to MP3

Options Menu

Click on the Options icon in the main toolbar to open the Options window. This is where you can add and make adjustments that will be performed on your WMA files during the conversion. You can add metadata to your converted MP3 audio files as well as change settings to handle duplicate files and formats. Once you are finished adjusting these options, click OK.
Audio File Converter Options

Select Output Destination

Set the output destination where you would like your converted files to go after you have converted them from WMA to MP3 format. Click on the Save to folder drop-down menu to select a folder from this list, or click on the Browse button to open the file finder window and select a folder on your computer.
Set Output Destination for MP3 Files

Set Output Format to MP3

With your output folder set, you can now set the output format to MP3. Click on the drop-down menu on the left side of the program next to the words "Output Format" to view the list of available audio file formats. To change your WMA files to MP3 files, simply select the option from this list that says, "MP3." All conversions performed will now be in the MP3 audio file format.
Set Output Format Type to MP3

Encoder Options

Click on the Encoder Output Settings... button to launch the window for WMA Output Settings. Here you can make adjustments and change audio encoder settings such as metadata, sample rate, bitrate, and amplify/normalizing audio. These settings will be applied during the conversion process while your WMA files are being changed to MP3 files.
WMA Encoder Options


Change WMA to MP3

Once everything is set up, you are ready to change your WMA files to MP3. Simply click on one of the Convert buttons, located in the bottom right-hand corner of the program and in the main toolbar. This will start the conversion process. You can select only one file to convert them one at a time or you can select all of them to perform easy batch MP3 conversions.


Finished

After the WMA to MP3 conversion is complete, you will see a green banner at the bottom of the program that says "Conversion Complete." You can click the button on the banner to open the output folder and view your newly converted MP3 files. You have now successfully learned how to changed WMA to MP3 using Switch Audio File Converter Software.


To read more about Switch and other audio topics, check out these similar posts:

Friday, February 15, 2019

How to Change M4A to MP3 Audio Files with Switch

How to Change M4A to MP3

How to Convert M4A to MP3

M4A files (MPEG-4 Audio files) are a common audio file type used by Apple, similar to the MP4. All of the songs on the Itunes Store are in the M4A format because of their compression size and high quality. Not all audio players and browsers will work with M4A files, though. That is why it is important to know how to change M4A to MP3 to be able to store your files in a more versatile and widely recognized format. With a simple audio file conversion software such as Switch, you can easily change M4A to MP3 without any problems.


Download Switch

You can download Switch Audio File Converter Software by clicking on one of the red download buttons on this page. You can also learn more about the program before downloading by visiting the product page here: www.nch.com.au/switch/
An image demonstrating how to download and install Switch Audio File Conversion Software
Download Switch Audio File Conversion Software
Download the program and follow the installation instructions as directed. Once you have installed the software on your computer, you can open the program and prepare to convert M4A to MP3.

Import M4A Files

Import your M4A files into the program by clicking on the icon with the green plus symbol in the top left-hand corner of the program that says "Add Files." This will open the file finder window where you can browse your computer and locate the M4A files that you would like to convert to MP3s.
An image demonstrating how to import M4A files into Switch to convert to MP
Import M4A files to Convert to MP3

Options Menu

Click on the icon that says "Options" in the main menu to open the Options Window and view some of the changes and adjustments you can make to your M4A files while performing this conversion. Here you can add metadata to your converted MP3 files as well as fix settings to handle duplicate files and formats. When you are finished adjusting these options, click "OK."
A screenshot of the options menu in Switch Audio File Conversion Software
Audio Conversion Options

Choose Output Folder

Select your output destination where you would like your converted files to end up after you have changed them from M4A to MP3 format. You can click on the "Save to folder" dropdown menu to select a folder from this list or click on the "Browse" button to open the file finder window and select any output folder destination on your computer.
A screenshot displaying the buttons to set an output destination folder in Switch Audio File Converter Software
Set Output Destination for MP3 Files

Set Output File Type to MP3

Once your output folder is set, you can select the output format. Click on the dropdown menu on the left side of the program next to the words "Output Format" to view the list of available audio file formats you can convert to. To change your M4A files to MP3 files, simply select the option from this list that says, ".mp3."
A screenshot demonstrating how to set the output format type to convert M4A to MP3
Set Output Format Type

Encoder Options

Click on the "Encoder Output Settings..." button to launch the window for M4A Output Settings. Here you can make adjustments and change audio encoder settings such as metadata, sample rate, bitrate, and amplify/normalizing audio. These settings will be applied during the conversion process while your M4A files are being changed to MP3s.
Encoder options windows for M4A encoding in Switch
M4A Encoder Options


Change M4A to MP3

Now that we have everything set up, you are ready to change your M4A files to MP3. Simply click on the "Convert" button, located in the bottom right-hand corner of the program, to begin the conversion process. You can select only one file to convert or select all of them to perform easy batch conversions.
Switch Audio File Converter Software converting M4A files to MP3 in a batch conversion
Converting M4A to MP3

Finished

After the conversion is complete, you will see a green banner at the bottom of the program that says "Conversion Complete." You can click the button on the banner to open the output folder and view your newly converted MP3 files. You have now successfully learned how to change M4A to MP3 using Switch Audio File Converter Software
How to convert M4A to MP3 with Switch Audio File Converter Software
Completed M4A to MP3 Audio File Format


To read more about Switch and audio file conversion, check out these similar posts:

Friday, November 16, 2018

How to Change CDA to MP3 with Switch CDA Converter

How to Change CDA to MP3 with Switch CDA Converter


A CDA file is an extension for an audio file on a CD. That means that CDA files do not actually contain sound data, but they reference a file that does. You may load CDA files onto your computer only to find that you cannot play them on your audio player. Learning how to change CDA to MP3 is the best way to get your CDA files into a universally recognized format that can be played anywhere. With a simple audio conversion tool, such as Switch Audio File Converter Software, you can quickly change CDA to MP3 and use the files from your CD in many different applications.


Add CDA Files

Open Switch Audio File Converter Software on your computer and click on the Add File(s) button. Click on the drop-down arrow to view a list of import location options. Clicking directly on the green plus sign will launch the file finder window. From here you can locate and select the CDA files that you wish to convert to MP3. Once your files are selected, click the button that says Open to bring them into Switch.


Listen to CDA Files

You can listen to your CDA files in Switch before converting them to MP3. Simply double click on any file in the program to listen or select a file and click on the Play button at the top of the program. This is a useful way to make sure that you have the correct audio file selected if your files do not have names.


Output Format

To change CDA to MP3 using Switch, use the Output Format drop-down menu to select MP3 from the list of output formats. This will make it so that any CDA files that you convert will be converted to MP3. The MP3 audio file format is the most common and widely accepted audio file type and converting your CDA files to MP3 will make it so that you can listen to them practically anywhere.


Encode Metadata

With Switch Audio File Converter Software, you can easily add meta tags and metadata to your MP3 files. Click on the Encoder Output Settings...button to launch the MP3 Output Options window. From here, you can choose from several audio file encoding options that the program has to offer. Click on the Metadata tab and enter any desired metadata content you would like in your MP3 files.


Encode Volume Settings

You can also adjust the audio settings while you convert using the Encoder Output settings button. Click on the tab that says Volume to make audio adjustments to your files as they are being converted such as Normalize, Amplify, and Noise Reduction.

Change CDA to MP3

With your CDA files imported into the program and your encoder settings set, you are now ready to change your CDA files to MP3. Click on the box that says Save to Folder and choose an output destination from the drop-down menu. This is where your converted CDA files will appear as MP3 files once the conversion has been performed. Select the CDA files you wish to change to MP3 and then click on the large Convert button, located in the bottom right-hand corner of the program.


Write Audio Tags

If your CDA files are coming directly from a CD, they may contain track info that can be included in the converted MP3 files. This can be very useful for keeping your music organized and adding your MP3 files to your music library. If you are prompted with this window, you can click Write Tags to have the audio track tag information from your CDA files included in your converted MP3s.


View Converted MP3 Files

When the conversion is complete you will see that all of your CDA files will have a green checkmark next to them in the program, meaning that they were all converted successfully. You can click on one of the two folder buttons that appear after a conversion to view your MP3 files and you can now play them anywhere you would like.


For more on audio conversion, check out these posts:

Friday, November 2, 2018

How to Mix an Audio File and Change to MP3 format

How to Mix an Audio File and Change to MP3 Format

Mixing audio files is a great way to take the best parts of all of your favorite songs and combine them into one awesome track. With MixPad Audio Mixer, you can mix a variety of audio types together to create mixes and mashups of your very own. After you have made a mix you love, you can change to MP3 format and share it with the world.


Load/Record Tracks

Click on the Load icon underneath the Home tab to add audio clips to your mix. You can add clips from your computer, rip a clip from a disc, or add an empty midi clip to record on a track using a midi controller. Imported clips will be added to the selected track. You can also record your audio tracks directly into MixPad by enabling recording  on the selected track, then clicking on either the record icon underneath the Home tab or on the record button at the bottom of the program.


Arrange your Clips

Use click and drag to rearrange the position of the tracks in your mix. Under the Editing tab, you can choose from a variety of options to cut and trim the clips in your mix. Select a portion of audio in a track to trim, delete, or silence it. Click on any point in an audio clip and choose the Split Clip option to divide it into two separate clips. You can then move the clips around or move them to different tracks in your mix. You can also Merge two separate clips into one clip anywhere you would like within your mix.


Adjust track settings

Adjust the play volume of an entire track using the volume slider in the track controls. You can also adjust the volume at different points in your track by clicking on the red line in the waveform and then dragging the square box that appears up or down to increase or decrease the volume. Click on the envelope icon to choose whether you are adjusting the volume or the pan in your track.


Apply Effects

You can apply live effects to the audio tracks in your mix by selecting a track and then clicking on the FX button to launch the effects window. Layer multiple effects on top of one another and edit and adjust them as you please. Effects will be applied to the audio in the selected track.


Change to MP3 Format

Now that you are finished mixing your audio, you can export your mix and change to MP3 format. Click on the Export Mix button located underneath the Home tab. Use the Browse button to select your output destination, name your file, and set your output file type to MP3. You can also change your file to MP3 directly from the Export Options window by clicking on the dropdown menu and choosing MP3 from the list of output file types. Click Export when you are ready to export your audio mix as an MP3 file.


For more on MixPad and audio editing, check out these tutorial videos:

Friday, October 5, 2018

How to Edit an Audio File and Change it to MP3

How to Edit an Audio File and Change it to MP3


The MP3 audio file format is the most commonly used format for sound today. MP3s are the preferred file type for sending and receiving audio files as well as storing them on discs and devices. Learning how to change an audio file to MP3 will provide you with virtually unlimited sharing and storing possibilities for your music and audio files. With a simple audio editing software such as WavePad Audio Editing Software you can easily learn how to edit audio files and save audio as MP3.


Import Audio

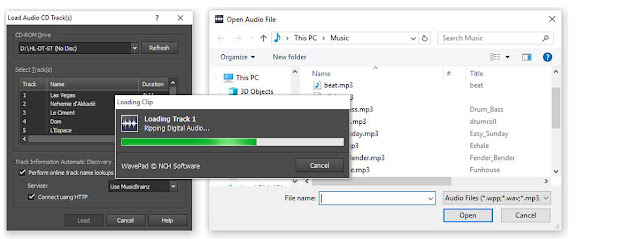
To begin editing audio files to export as MP3, you will first have to import those files into WavePad. You can add files to a WavePad project directly from a disc, from your computer or external drive, from the NCH Sound Library or you can record audio directly into the program.
 

Edit Audio

Before changing audio to MP3, you may first want to edit your music or sound file. Click on the Edit tab in the main toolbar to view the options for editing your audio files in WavePad. From here you can perform basic audio editing such as splitting and trimming clips, removing silences, mixing audio files, and performing general audio file cleanup.


Adjust Audio Levels

Adjusting audio levels is something both seasoned music producers and beginners alike can quickly accomplish in WavePad. Adjusting audio levels will allow you to clean up and improve the sound quality of audio files. Click on the Levels tab in the main tool bar to view the different options for adjusting audio levels. Use the Noise Reduction feature to eliminate any unwanted background noise in your audio. You can also use the Amplify function to increase the sound volume or the Normalize function to further optimize the overall sound quality.


Apply Effects

WavePad comes loaded with a variety of exciting and useful audio editing effects that you can use on your files. Choose from a list of classic effects such as Reverb, Chorus, and Echo or experiment with the many other effects available such as the Voice Changer. WavePad even allows you to combine and layer effects over each other to in order to create your own unique and original sound effect.


Use Tools

Make use of the many tools available in WavePad while you learn how to edit audio files and save them as MP3. Use the Surround Sound Editor to edit and apply a surround sound effect to your audio for playback with a surround sound system. The Batch Converter Tool allows you to add multiple files for editing and converting all at once within your project. You can access the NCH Sound Library from the Tools tab and access a library of free sound effects and audio samples to use in your audio editing project.


Save as MP3

Now that you have successfully learned how to edit an audio file with WavePad, you are ready to learn how to change audio files to MP3. Click on the Home tab in the main toolbar and then click on the drop down arrow next to the Save button. Here you can select the option that says Save File As... to launch the file finder window. Select your preferred output destination and name the file what you would like. Then click on the drop down menu that says Save as File Type and choose the option MPEG Layer-3. This is just a longer way of saying "MP3." Once you click Save, your newly edited audio file will appear as an MP3 in your chosen output folder.


For more on audio editing, checkout these posts: 

Friday, July 27, 2018

Change Audio to MP3 Format with Switch

How to Change to MP3 format


The MP3 format is one of the most common audio file formats in the world today. MP3 files are widely used for saving and sharing digital audio files because of their compression size and ability to maintain the high quality of their original format. This makes the MP3 file type great for storing and emailing because download speeds are quick and the files don't occupy much space. You may have found yourself in possession of audio files on your computer or on a disc that is in a different format that you would like to change to MP3. With a simple file conversion software such as Switch Audio File Converter Software, you can quickly learn how to change to Mp3 format in a matter of seconds.


Import Files into Switch

The first step to learning how to change to MP3 format is to open your copy of Switch and add/import the files that you would like to convert. Switch allows you to import individual audio files, video files, entire folders, or even import them from a DVD or audio CD. Click on the green Add Files button at the top of the program to begin adding your files. Once you have selected the files you wish to convert, click Open. You can also drag and drop files from your File Browser window directly into Switch.
How to change to Mp3 Format
Import files to convert to mp3 

Set Output Destination

Next, decide where you would like your new files to go once you have converted them. This is where your files will be located after they are changed to MP3 format. Use the drop-down menu or the Browse button at the bottom of the program to set your output folder. You can click on the Open Output Folder button to view the selected output folder and its contents. You can also check the box next to it to save your files to the same folder as the source files. This option will output your converted MP3 files right next to their original versions.
How to set output destination for changing to mp3 format
Set output destination 

Set Output Format

Switch is capable of converting to just about any audio file format you can think of. However, you are here because you want to know how to change to MP3 format, specifically. Click on the Output Format menu at the bottom of the program to open the drop-down menu. Select .mp3 as your output format. This will be applied to any and all files that you select.
How to change output format of audio files to mp3
Set output format 

Output Options

Click on the Options tab next to the Output Format menu to open the Options window. Here you can adjust some of the more advanced options such as the Bitrate and Channel Mode. You can also adjust the metadata that will be attached to your newly converted MP3 files. For more information on adjusting audio file meta tags, check out this blog post:
How to Edit MP3 Tags and Metadata with Switch Audio Converter
How to edit mp3 meta descriptions and mp3 meta data
Edit MP3 metadata 

Convert to MP3

Now that we have chosen our files and set the output format and destination, we are ready to convert our files to MP3. If you imported an entire folder or files from a disc and you only want to change some of them to MP3, simply go through and select those files. Otherwise, with all of your files selected, click on the Convert button at the bottom right of the program. The conversion will be performed and your new MP3 files can now be found in your chosen output folder.
How to convert files to mp3 with Switch
Conversion complete


For more on Switch, check out some of our other posts: