Showing posts with label animation. Show all posts

Tuesday, August 18, 2020

How to Create Keyframe Animations in Minutes


Keyframes are used to specify the value of a property at a specific time. They allow you to tell your animation software where you want to change the value for a layer or the effect such as position, opacity, color, rotation, etc. By setting these keyframes and values, you can create smooth motion transitions. Learn how to create keyframe animations using Express Animate, in the video below. 

Using Keyframes to Animate in Express Animate


Simply follow the steps demonstrated in the above tutorial and you too can edit an object's properties, add and remove keyframes, and edit the values linked to a keyframe. Express Animate also allows you to add digital effects, vector masks, audio tracks, and more. Download Express Animate for free and try it yourself. For more Express Animate tips and tricks, check out more video tutorials here.

Monday, August 3, 2020

How to Change GIF Speed

If you have ever been to a stand-up comedy show, you know timing is one of the most important factors in determining how loud and frequent your laughs are. The same can be said about animated GIFs. 


Whether the GIFs are used as memes, display ads or to illustrate a process, the speed of the GIF can influence its overall effectiveness. 

If the playback speed of the GIF file is too fast, viewers may miss some of the essential elements of the animation. Likewise, if the speed is too slow, viewers may lose interest and stop watching. Either way, the main message of the GIF isn’t conveyed properly to the intended audience, which is a problem. 

The good thing is, Express Animate Motion Graphics and Animation Software can help change GIF speed in less than a couple of minutes. 


How to increase GIF speed

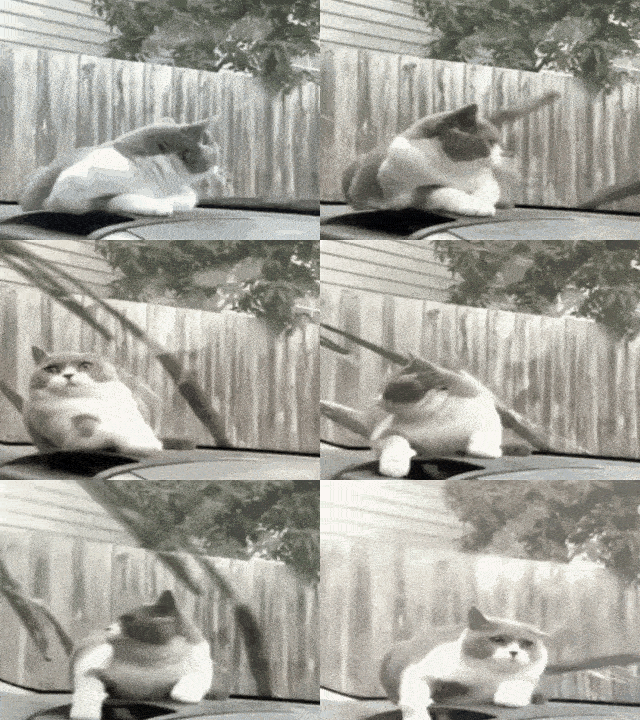
Take this GIF of a cat getting startled by a car’s windshield wipers. It is a bit too slow and might be more effective if the playback speed was faster to enhance the dramatic effect. 

Upload GIF to Express Animate software

Open Express Animate and under the File tab, select Load Media Files, and choose your GIF file.

Open the Speed Change tool 

Select the GIF under the Composition panel on the left or at the bottom. Right-click on the selection and click on Adjust Speed. 

Increase GIF speed

You can now adjust the speed of the GIF by increasing the percentage value. By default, the speed of the GIF is set at 100%. To increase the speed of the GIF, choose a value over 100% and hit Set. Test different speed levels and preview your GIF. 

Save and export GIF

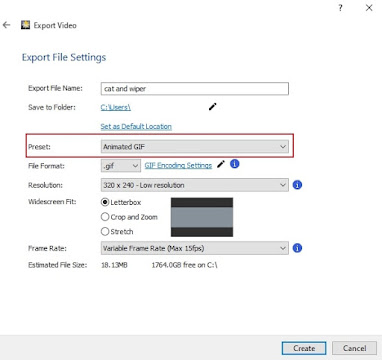
Once you’re happy with the result. Under File, choose Save Video and select Animated GIF under the Preset option to export your video as a GIF using the default settings. You can also manually adjust the GIF resolution and frame rate accordingly. 

Updated GIF with increased speed

How to decrease GIF speed

Sticking with the theme of funny animal GIFs, let’s use this GIF of this French bulldog having a moment and falling off a chair in a peculiar fashion. To decrease the speed of the GIF so that we can properly capture the bulldog’s spectacle in all its glory, you guessed it, the process is the exact same.

Upload and edit GIF speed

Follow the same steps from the above section to upload your GIF and open the Speed Change tool.

Decrease GIF speed

As the default speed is set at 100%, to decrease the GIF speed, choose a value under 100%. Test different speed levels and preview your GIF. 

Save and export GIF

Similarly, follow the exact same steps to export your video as a GIF. 
Updated GIF with decreased speed

You’re all set. You have successfully changed the speed of your GIF and is now ready to be shared with the world. Available for PC and Mac, Express Animate is a comprehensive GIF software and can be used to create character animations, make animated GIFs from scratch, or edit GIFs with features such as rotate, resize, annotate, digital effects and more. 

Friday, March 15, 2019

How to Make Character Animations with Express Animate

How to Make Character Animations with Express Animate


Character animation allows you to bring animated characters to life using simple software and your own creativity. You can animate anything you would like such as clipart, computer drawings, text and more. Character animation used to be a very time-consuming and complicated process that only professional animators could do. However, now it is easier than ever for anyone to create this type of art and make character animations of their own. With simple and easy-to-use 2D animation software such as Express Animate, you can quickly learn how to make animations of your own in no time.


In this first video, you will learn how to create a character "puppet" or character from scratch to animate with Express Animate Animation Software. Use the pen tool to draw shapes and the Fill tool to add color to them.


This second video will demonstrate how to animate the character puppet that you created in the previous tutorial. Add anchor points to your object to create parent-child relationships and create keyframes to mark a changed state of any parameter in time.


And there you have it. Simply follow the steps demonstrated in the above tutorials and you too can create your own animation. Character animation is fun and easy and you will likely find yourself making them more and more now that you have learned how.

Wednesday, January 6, 2016

How to Use the VirtualDub MSU Cartoonizer Filter for VideoPad

The VirtualDub MSU Cartoonizer Filter is a Free Plugin for VideoPad by MSU Graphics and Media Lab to Animate Your Videos


Download For Free Here:
video-msu-cartoonizer-virtualdub-plugin.soft112.com

The Cartoonizer filter overlays strokes and edges onto your video to simulate animation and includes a variety of styles such as colored and non-colored pencil, watercolor and oil painting to convert movies into cartoons and also to transform images into artistic paintings.

Editor's Note:
VideoPad comes with a built-in cartoon filter, however, for those who want additional controls, we support the Cartoonizer plugin. 
Please note that due to the plugin being a 3rd party product and not maintained by us in any way, we cannot provide technical support if the plugin causes the program to crash. We recommend saving your project before applying the filter.


To install the Cartoonizer plugin,

  1. Download the filter & specify a location on your computer to save them. We recommend creating a folder called "VirtualDub" to save this and any other VirtualDub effects in.
  2. Once you have downloaded and saved the Cartoonizer plugin, open a video project in VideoPad. Click the Effects button on the Home tab, and from the effects, drop-menu at the top, select Load/Unload VirtualDub Plugins. This will open the Video Effect Plugins window.
  3. Click the Load File(s) button and browse to your saved VirtualDub effects. Select the Cartoonizer filter (look for .vdf format) and click Open. Click OK to close the Video Effects Plugins window.
  4. The filter will be added to the drop menu in the Video Effects window. Select the effect to open it and click the Configure Plugin button to view/adjust its parameters. You can edit the effect at any time after it has been applied by clicking this same button from the Applied Effects list for the selected clip. 

The Interface and Settings


"Painting" mode settings:

Brush Size
Controls the size of the brush. Small brushes make the image more detailed and are recommended to apply small brushes to the video with small resolution. Large brushes make the image more blurred to amplify the non-photorealistic effect.

Brush Wetness
Controls the simulated wetness of a brush, Higher settings reduce the accuracy of strokes.

Color Randomization
Adds variety to the color of strokes.

Color Saturation
Changes Saturation of the resulting image.

Show Edges
This setting allows to render edges and add a stroke to them. and can be modified in Pencil Edge Options.


"Filled Segments" mode settings:

Number of Segments
Controls the number of rendered segments.

Color Saturation
Changes Saturation of the resulting image.

Show Edges
This setting allows to render edges and add a stroke to them. and can be modified in Pencil Edge Options.

"Drawing" mode settings:

Pencil Type
Allows choosing the type of pencil, Black or Colored.

Number of Edges
Controls the number of rendered edges.

Edge Brightness
Controls the brightness of edges for non-colored pencil and saturation for colored pencil.

Edge Thickness
Controls edge thickness.

Edge Accuracy
Controls accuracy of edge rendering. The left side of the bar maximizes precise strokes.

Use Face Detection
If enabled, this setting allows improving the accuracy of rendering for Faces.

General Settings:


Process each N frame
Control the number of processed frames. Each N-th frame is processed, other frames are duplicated. This parameter can be used to reduce the realism of the processed video or decrease shaking. 


To see various examples of how the filter can be used, take a look at the MSU gallery here