

Monday, March 26, 2018
Just Released: ClickCharts Diagram Flowchart Software for Mac OS X
Friday, March 23, 2018
Just Released: Express Burn Disc Burning Software for Windows

Thursday, March 22, 2018
New Release: Doxillion Document Converter for Windows

Wednesday, March 21, 2018
Just Released: Debut Video Capture Software for Windows

Tuesday, March 20, 2018
Wedding Planning With DreamPlan
Be Your Own Professional Wedding Planner With DreamPlan

Planning your own wedding should be more fun than it is nerve-racking. A good wedding planning software is a great way to start exploring ideas and marking things off of your wedding planning checklist. With an easy to use 3D design software such as DreamPlan, you can create and visualize just about every important detail of your wedding. That way when your big day is finally here, you have nothing to worry about because you will have it all planned out.
The DreamPlan Wedding Content Package
 |
| Add Content Tab |
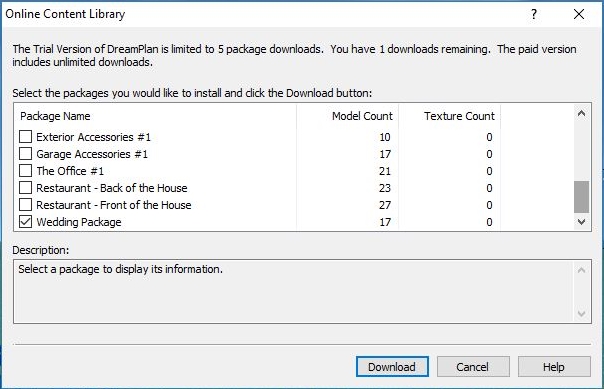 |
| Download The Wedding Package From The Online Content Library |
Planning A Wedding Ceremony
The wedding ceremony is perhaps the most important preparation for your wedding. You can quickly plan out the ceremony layout for your wedding venue with this easy-to-use software. Add and arrange benches and then decorate the isle with flowers. Decide if you want to have wedding arches or a gazebo. Then paint it all exactly the way it will be on your special day.
 |
| Outdoor Wedding Ceremony |
Planning A Wedding Reception
The wedding reception oftentimes takes more preparation than the wedding ceremony. A wedding reception needs catering, entertainment, table settings, a dance floor and much much more. Create your ideal wedding reception layout in DreamPlan to make a reception that you and your guests will never forget. Plan a stage or booth for your wedding band or DJ. Create a dance floor for the bride and groom's first dance. Arrange your tables and then make a seating chart. Create the reception that is perfect for your wedding venue.
 |
| Outdoor Wedding Reception |
Making Wedding Seating Arrangements
 |
| Wedding Table Arrangements |
 |
| Wedding Seating Chart |
Be as detailed as you want with the Text Label Tool. With this tool you can make the perfect wedding seating chart, so that there is no confusion on the big day.
Choosing Wedding Colors
 |
| Wedding Color Schemes |
Set the Tables
 |
| Wedding Table Settings |
Plan Every Detail
 |
| Wedding Guest Book |
Planning your wedding with a 3D software like DreamPlan will help you make sure that you have thought of everything. Cakes, flowers and even a wedding guestbook, are just some of the items that you can add to your virtual wedding. This software will quickly have you checking items off of your wedding planning guide so that you can focus on enjoying your celebration.
Thursday, March 15, 2018
Combine Black and White With Color In PhotoPad
How to Make A Photo With Color and Black and White

You have probably seen one of these dramatic-looking images and wondered how it was created. It is a clever and imaginative way to draw attention to a particular color or section of an image and give it that artistic look and feel. The coolest part about these stylish images is that you don't have to be a photo editing expert to make one of your own. The process of making a photo that combines black and white with color can be broken down into three easy steps:
- Select the area you want to color
- Invert the selection
- Apply the Grayscale filter
After reading this tutorial, you too will be able to create an attractive image of your own using the latest version of PhotoPad photo editing software.
Making A Selection
The first step will be to select the part of your image that you wish to keep in color. PhotoPad features 6 different tools for making selections and they each have their own benefits. |
| PhotoPad has six different selection tools |
 |
| Select a region along its outline |
Selecting With The Magnet Tool
The Magnet tool is the tool that is best suited for this project. The Magnet tool works by finding the edges on the object you are selecting. The tool looks for the abrupt color change that is typical of the edge of an object against a background and then uses those detected edges to make an incredibly precise selection. |
| Select a region with similar colors |
Selecting With The Wand Tool
The Wand tool is another perfectly acceptable option. The wand tool uses color detection to make a selection. You can adjust the sensitivity of the tool so that it selects more or fewer colors on the spectrum of colors you are trying to select. Hold down the shift key while making your selection to add more to it. The Wand tool works best when the background is a different color than the object you are selecting and when the object you are selecting doesn't consist of too many different color tones.Inverting A Selection
I used the Magnet select tool to select the petals around this flower. You want to make sure you zoom in close to ensure that you are making your selection as precise as possible.
With your object still selected, right-click on the selection and choose the option on the drop-down menu that says "Invert Selection." You will notice that now, instead of our flower being selected, everything EXCEPT the flower is selected. That is just what we want.
Using The Grayscale Filter

 With our background selected, we are going to visit the Filters tab, which is located at the top of the PhotoPad application. Click on the Filters tab and then look for the Grayscale filter on the far left. Grayscale means that only shades of gray will be used to color your image. It is more commonly referred to as "black & white." Now, click on the Grayscale filter option.
Because we have something selected, this will launch a prompt asking if we want to apply the Grayscale effect to the entire image or just to the selected region. Because we now have just the background selected, we will choose to apply the effect to the Selected Region.
The Finished Product
As you can see in this image, the Grayscale Filter effect has been applied to the background while leaving the balloons and their bright colors untouched. The finished product is a beautiful image that jumps right out at you.
Just Released: Crescendo Music Notation Editor for Windows

Monday, March 12, 2018
Just Released: Express Invoice Invoicing Software for iOS

Wednesday, March 7, 2018
Just Released: PhotoStage Slideshow Producer for Mac OS X

New Release: Express Scribe Transcription for Mac OS X

Tuesday, March 6, 2018
New Release: SoundTap Streaming Audio Recorder for Windows

Friday, March 2, 2018
Bypass Voxal Voice Changer Effects
How To Switch Back to a Normal Voice with Voxal Voice Changer

Bypass Voice Effects with Voxal Voice Changer
With Voxal voice changing software, you can change your voice in real-time to sound like a girl, alien, robot, or stadium announcer. Voxal works with any chat program that uses a microphone.
In some cases, you may want to quickly switch back to your normal voice. With Voxal, you can easily switch back from a voice effect to your normal voice without exiting the program. To do this, simply use the "ByPass" option to momentarily remove all voice effects.
How To Remove Voice Changer Effects
To switch back to your normal voice while using Voxal you can use the "Bypass" tool. The Bypass option is located in the Tools tab in the top bar menu.

Selecting the Bypass tool will bypass the current voice, which will remove all effects from your voice. To switch back to a voice effect, simply deselect the Bypass tool. To deselect the Bypass tool, simply click on the Bypass button a second time.
If the Bypass tool has a dark background, the Bypass tool is currently selected.
Bypass tool selected:

Bypass tool not Selected:

Want to learn more about how to use Voxal? Check out our Voxal Video Tutorial Series.
Thursday, March 1, 2018
New Release: MoneyLine for Windows


