How to Make a Time-Lapse Video with VideoPad

Time just doesn’t seem to move fast enough for some of us anymore. A time-lapse video is a great way to observe change over time without having to literally watch grass grow. You can make a time-lapse video of anything you would like, such as a sunset, a cross-country drive, a plant growing, or anything else that you can imagine. With a simple and easy-to-use video editing software such as
VideoPad, you can make stunning time-lapse videos of your own and share them with the world.
What is a Time-lapse Video?
There are basically two types of videos that are considered time-lapse videos. The first type is made when a video is taken on a camcorder and then later that video is sped up to quickly show the passing of a long amount of time. This can make everything in the video appear to move quickly or just certain objects in the video, depending on where the activity was in your shot and if your camera was still while shooting. Think about a sped-up video of foot traffic in a train station or of snow building up during a winter storm. The second type of time-lapse video is made by taking a series of pictures of the same object over time and then playing them all together in rapid succession. This method creates a video-like effect of that object changing from picture to picture.
Setting Up Your Camera for a Time-lapse
Ready...
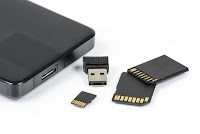
Make sure that your camera is fully charged and make sure that you have enough storage for the number of pictures you will be taking or the amount of time you will be filming. Make sure that your SD card is formatted and cleared so that there are no issues saving your images or recordings. When a camera is left on or left recording for long amounts of time, it can quickly drain the battery. Make sure that your battery is fully charged and that you have a spare ready just in case.
Aim...
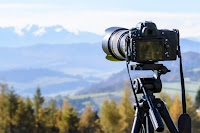
The most common element of almost all time-lapse videos is that the shot typically remains stationary, while one particular object or area within that shot moves. Using a tripod is the easiest way to achieve maximum camera stability. If you do not have one available, find a sturdy and secure place to set your camera so that it can remain completely still and untouched. Look through your viewfinder or on your camera’s playback screen and set markers just outside of the shot so that you can line that exact shot up again later if you do move your camera.
Fire!!!
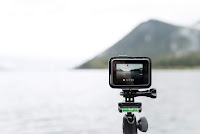
If you are taking a video, all you have to do is start your recording and remember to come back to stop it when you are finished. Making a time-lapse video with photos can be a little more labor-intensive. Depending on how fast your subject is moving or changing, you will want to use different intervals of time for taking pictures. Some modern cameras do have settings on them that enable you to set predefined increments of time to take a photo. Otherwise, you can set a timer and hang out with your camera. A couple of photos each minute is good for a sunrise, but for something like a plant growing, a couple of photos a day is better.
Photos or Video?
The main factor for this decision is time. How long is it going to take to capture everything you want in your time-lapse? Anything that takes longer than a day to capture would probably be better left to pictures. This is mainly because of storage. Video files are large, photo files are not. A 24 hour HD video won't even fit on most computers and would likely require 2-3 battery changes to film it all. Making a time-lapse with photos is great for capturing gradual change over time and then getting to watch it all at once in a matter of seconds. Using video is good when change happens quickly and you want to capture every second of it.
Making a Time-Lapse with Photos
Set up your camera on a tripod with your memory card formatted and your battery fully charged. Begin taking your pictures in even increments of time or allowing your camera to do so for you if it has the capability. Once you begin taking your pictures, do not move or disrupt your camera. When you get back to the lab, open the latest version of
VideoPad Video Editing Software. There are two ways to make a time-lapse with photos in VideoPad.
Method #1
 |
| Add Images as Video in VideoPad |
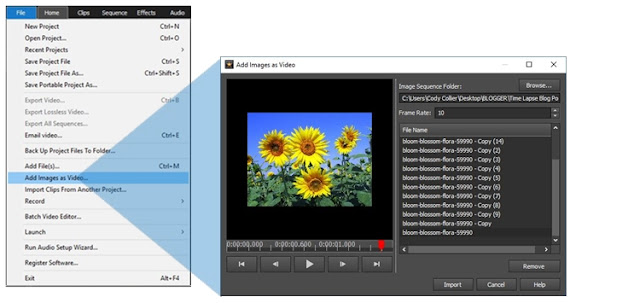
You can create a great time-lapse video with pictures using VideoPad's
Add Images as Video function. From the
File drop-down menu, select
Add Images as Video... You will be prompted to select the folder on your computer containing all of your photos. After that, you can set the frame rate. This is a fast and efficient way to make a time-lapse video from your photos. The lowest frame rate that can be set is 10 fps, though. If this is too fast for your photo time-lapse, you will have to make your video using the second method.
 |
| Images as a Video Output File |
Method #2
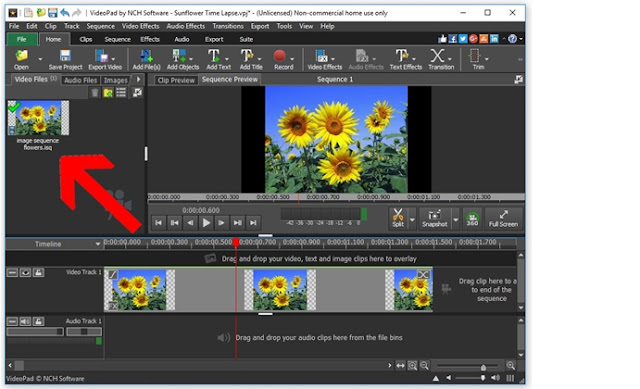
Drag all of your photos into the media bin in VideoPad. Then drag them all onto your timeline in the order that they were taken. To adjust the duration of all of your images at once, click on the first clip in the timeline, hold down the shift key, and then click on the last clip in your timeline. This will select all of your images at once. Right-click on any one of the selected images in your timeline and then select
Change Duration from the dropdown menu. You will see under the clip preview window that the default duration of 3:00 sec is now highlighted in blue and can be adjusted. You can experiment with what feels right for your time-lapse. Typically, for a time-lapse made of images, the duration of each image doesn't need to be more than 1/2 a second long. Anything longer and your video will look choppy and slow.
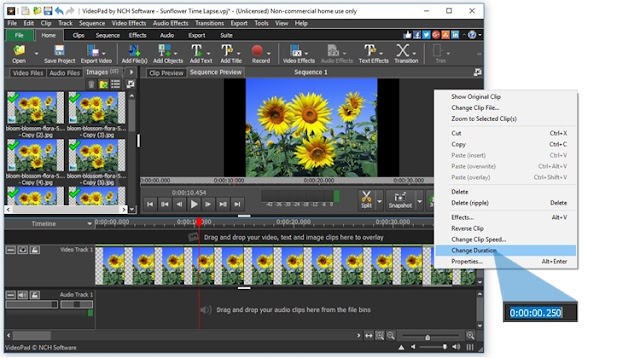 |
| Change Duration of Multiple Images at once in VideoPad |
Making a Time-lapse with Video
Set up your camera on a tripod with your memory card formatted and your battery fully charged. Start your video recording. Once you start your recording, do not move or disrupt your camcorder or anything in your shot until you are finished. When you get back to the lab, open the latest version of
VideoPad Video Editing Software. Drag your video clip into the media bin in VideoPad and then drag it onto the timeline. Right-click on your clip and select the option that says
Change Clip Speed.
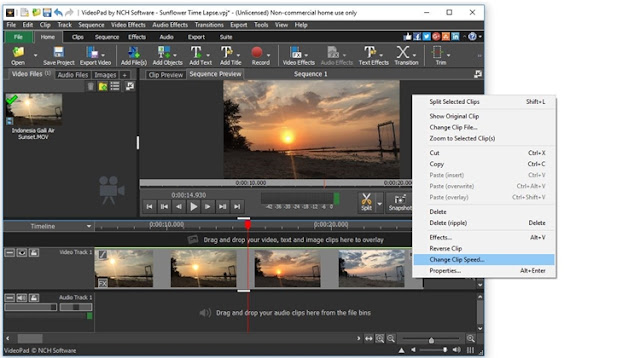 |
| Change Clip Speed of a Video |
That will open up the
Speed Change function and allow you to adjust the speed of your clip as a percentage. It is default at 100% which is normal speed, so you can increase it from there. Remember that 200% is making your clip twice as fast, 400% is quadrupling the speed, and so on and so forth. You can adjust it to your liking and try out different speeds until it looks perfect. Click
Set when you are finished and your time-lapse video is now ready for export. You can add music or captions to your time-lapse video and then export it to your preferred location or upload it directly to YouTube.
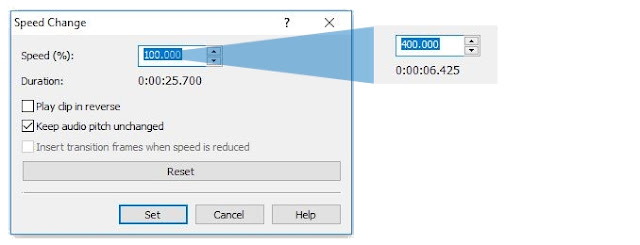 |
| Increasing Clip Speed 4x |