Resize a Picture Easily with Pixillion Image Resizer
There are times when you may have needed to upload or email a picture you have, only to find out that the file size is too large. Many websites and email clients have restrictions on how large an image can be. Large images take up a lot of space and may not be necessary for all purposes. Learning how to resize a picture is valuable knowledge to have when you encounter a situation like this. With
Pixillion Image Conversion Software, you can quickly learn how to resize images with ease.
Import Image
To resize a picture, launch your copy of
Pixillion on your computer and open the image file you would like to resize. Click on the green plus sign that says
Add Files and select your file or files from their location on your computer. You can resize a single image or batch resize multiple pictures at once.
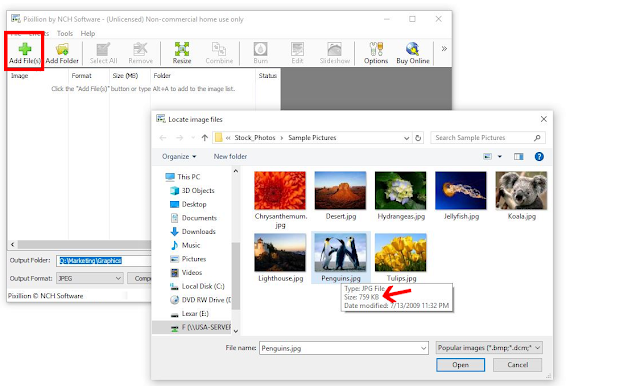 |
| 759 KB image file size imported into Pixillion |
Output Folder and Format
Next, select your
output format and
output destination folder at the bottom of the program. If you wish to change the file format of the picture you are resizing, this is where you can select a new file type. Once you have chosen the output folder where you would like your resized picture to be sent, you are ready to resize.

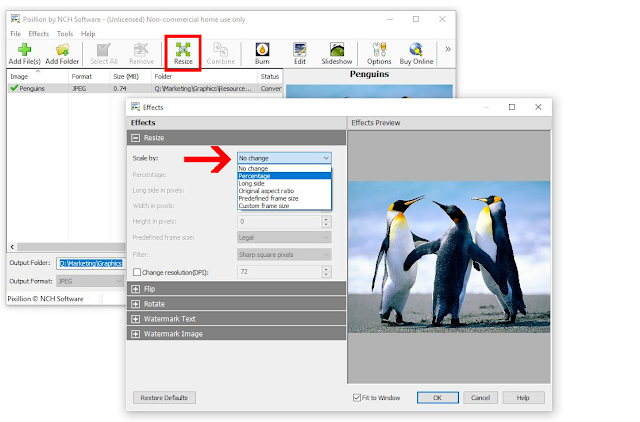
Resizing Options
With your image imported into
Pixillion and your export format and destination folder selected, you can now click on the
green Resize icon in the main toolbar. This will launch the
Effects window where the resize tab will open by default. There are 5 different resizing options available to you in Pixillion.
- Scale by Percentage
- Scale by Long Side
- Scale by Original Aspect Ratio
- Scale by Predefined Frame Size
- Scale by Custom Frame Size
 |
| Scale by options |
Scale by Percentage
Using the
Scale by Percentage option is one of the quickest and easiest methods to resize a picture. If you have been given a specific file size you need to achieve with your resize, you can easily adjust the percentage scale to bring your file down to that size.
 |
| Resizing an image by Percentage Scale |
Pixels and Resolution
When resizing a picture, the resolution of the image will change. The lower the resolution of an image, the fewer pixels the image will be made up of. Pixillon allows you to decide how it should handle those pixels when resizing an image. You can choose to have
sharp square pixels or choose for them to come out
smooth and blurry. The sharp and square option will make your picture more in focus, but the pixels may be more noticeable. The smooth blurry option will smooth out the harsh edges of pixelation more.
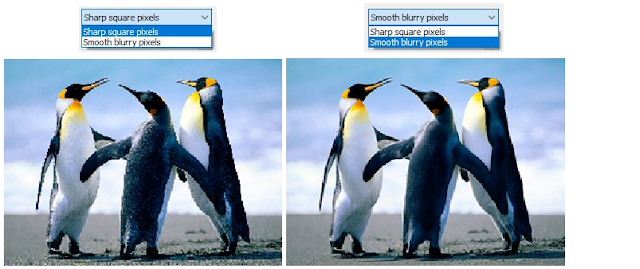 |
| Square Pixels (left) vs. Smooth Pixels (right) |
Effects
There are several other effects that can be applied to an image while resizing it. You can flip and rotate your image as well as add text and image watermarks. Use the Effect Preview window to view the effects before applying them.
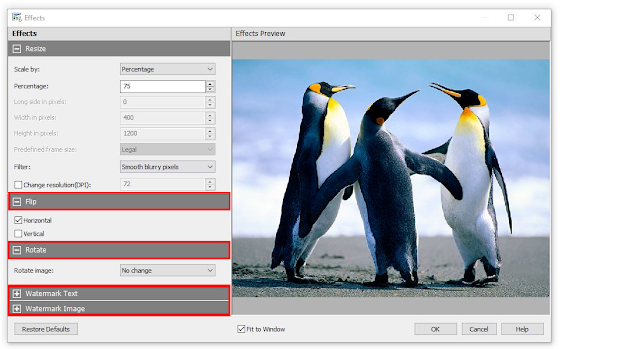 |
| Other Pixillion effects |
Finished Product
When you are finished applying the resize scale and any effects to your picture, click the
OK button at the bottom of the effects window to save the settings. With the picture, you want to resize selected, click the
Convert button in the bottom right corner of the program. You will see a pop-up window informing you that your conversion is complete. You can either open it then to view your resized image, or view it in the output folder you chose. Notice that our picture that started out at 759 KB has now been resized down to 160 KB with almost no loss in quality.
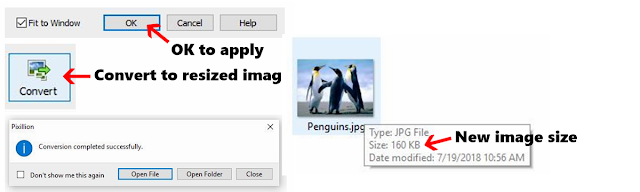 |
| Resized image file size is 160 KB |


