How to Change WMA to MP3 with Switch Audio Converter

Windows Media Audio files, or WMA files, are a common audio file format, primarily meant to be opened and played on Windows Media Player and other Microsoft audio players. You can play WMA files with some other third-party software, but many audio players and devices (iPhone) will not support them. That is why it is useful to know how to change WMA to MP3. MP3 files are a much more commonly supported file type and are arguably a superior format anyways. You can easily change WMA files to MP3 format with an audio file conversion program such as
Switch WMA File Converter Software.
Download Switch
Download Switch Audio File Converter software. Follow the installation instructions and launch the program on your computer.
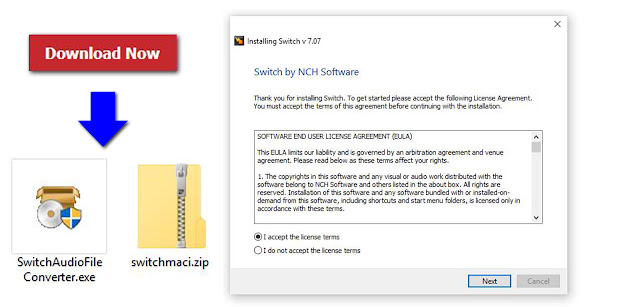 |
| Download Switch Audio File Conversion Software |
Import WMA Files
Click on the green
Add File(s) button located in the main toolbar to open the file finder window. Find and select the WMA files on your computer and click
Open to bring them into Switch to convert them to MP3 format. You can also drag and drop WMA files directly into the program to change.
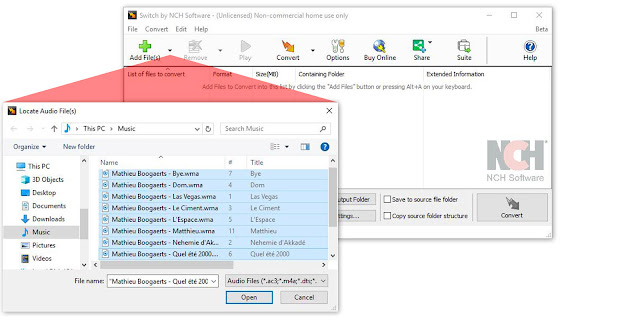 |
| Import WMA files to Change them to MP3 |
Options Menu
Click on the
Options icon in the main toolbar to open the
Options window. This is where you can add and make adjustments that will be performed on your WMA files during the conversion. You can add metadata to your converted MP3 audio files as well as change settings to handle duplicate files and formats. Once you are finished adjusting these options, click
OK.
 |
| Audio File Converter Options |
Select Output Destination
Set the output destination where you would like your converted files to go after you have converted them from WMA to MP3 format. Click on the
Save to folder drop-down menu to select a folder from this list, or click on the
Browse button to open the file finder window and select a folder on your computer.
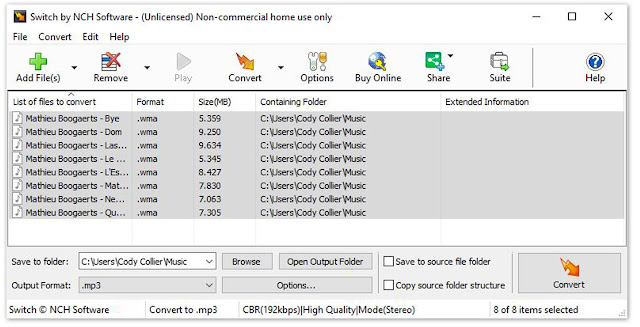 |
| Set Output Destination for MP3 Files |
|
Set Output Format to MP3
With your output folder set, you can now set the output format to MP3. Click on the drop-down menu on the left side of the program next to the words "Output Format" to view the list of available audio file formats. To change your WMA files to MP3 files, simply select the option from this list that says, "MP3." All conversions performed will now be in the MP3 audio file format.
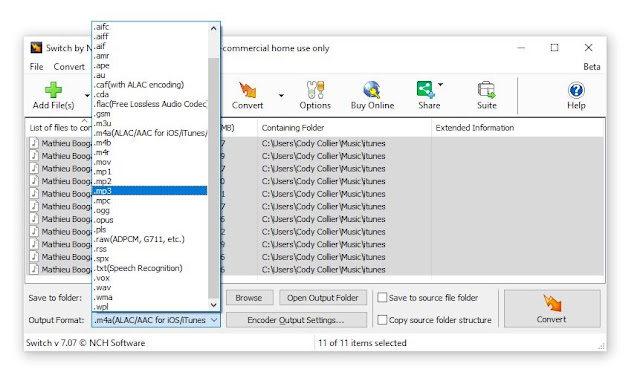 |
| Set Output Format Type to MP3 |
Encoder Options
Click on the Encoder Output Settings... button to launch the window for WMA Output Settings. Here you can make adjustments and change audio encoder settings such as metadata, sample rate, bitrate, and amplify/normalizing audio. These settings will be applied during the conversion process while your WMA files are being changed to MP3 files.
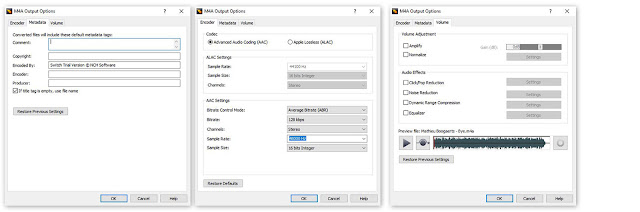 |
| WMA Encoder Options |
Change WMA to MP3
Once everything is set up, you are ready to change your WMA files to MP3. Simply click on one of the
Convert buttons, located in the bottom right-hand corner of the program and in the main toolbar. This will start the conversion process. You can select only one file to convert them one at a time or you can select all of them to perform easy batch MP3 conversions.
Finished
After the WMA to MP3 conversion is complete, you will see a green banner at the bottom of the program that says "Conversion Complete." You can click the button on the banner to open the output folder and view your newly converted MP3 files. You have now successfully learned how to changed WMA to MP3 using Switch Audio File Converter Software.
To read more about Switch and other audio topics, check out these similar posts:


No comments:
Post a Comment