Showing posts with label remove noise. Show all posts

Saturday, October 26, 2013

Catch A Ghost On Tape

In honor of Halloween, we are taking a quick look into the paranormal world, and the recording and analysis of Electronic Voice Phenomenon (EVP). With all the little ghosts and goblins about you may want to have a little seance or just listen to the beyond.

EVP Recording
You don't need to be a ghost hunter to try recording an EVP, although being open, polite, and respectful are believed to be factored in success. Here are some tips to help you get started:
  • Equipment. You need an audio recorder, a headset for when you analyze your recordings, and a touch of patience that couldn't hurt.
  • Start somewhere quiet. You don't need to be in a "haunted" location to make your recording, and while some believe background/white noise may encourage paranormal voices when you are just getting started the more traditional quiet location will make analysis easier.
  • Recording. Take note of the noises around you as you record so you can rule them out when you analyze the audio later. Also, be sure that you do not have voice-activated recording turned on.
  • Ask Questions. One of the most common techniques is to introduce yourself and then ask a series of questions as if you expect a response, with pauses between questions for replies.
  • On to the Analysis. When you are done recording it's time to listen for EVP messages.

EVP File Classification
EVP Recording and Analysis There are three classifications of EVP recordings based on their clarity, and the type of recoding you have will also affect the amount of editing you will need to do. The Classes are:

Class A:  A voice that can be understood without needing headphones and there is general agreement on the content.

Class B:  A voice that requires headphones to hear and not everyone can agree on its content.

Class C:  A voice that requires much filtering and even by wearing headphones nobody can agree on its content.


Analyzing EVP Recordings
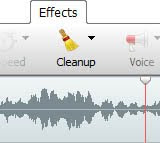
The first step is to listen to the original recording from start to finish, making note of when you hear something. Before you start isolating and editing, be sure to save a copy of the original file so you can always go back, or allow people to compare the files.

Chances are you will need to do some audio editing—enter WavePad—to better hear the EVPs on your recording. If you are planning to share your findings remember that the more editing you do the more possible criticism you can get from skeptics. First, you will want to trim the audio file to the sections you took note of. Then common editing done includes amplifying those hard-to-hear sections, possibly removing background noise, and slowing down the EVP since they are often spoken very quickly.

Of course, this is a very cursory look at Electronic Voice Phenomenon, but if you are intrigued by the topic here is a brief list you can explore to learn more and find additional advice on recording and analyzing EVPs from some ghost hunting pros: Or, if EVPs don’t fascinate you, you can always capture your little gremlins in their costumes on film instead. We have software to help you memorialize the holiday that way too.

Wednesday, May 8, 2013

Video Competition Tips & Advice

VideoPad Video Editing for Video Competitions Ready to take your videos beyond home movies? For VideoPad users who are ready to showcase their creativity and videographer skills, we've put together some advice and resources for getting your videos ready to compete.

There is a wide range of video contests out there, put on by all kinds of companies and products, in a variety of themes. The smaller contests will have smaller prizes, but they will also have less competition, so they are still worth considering. To find a contest that appeals to you here are a few sites to explore: Once you have a contest picked out the real work starts. Be sure to take your time and do your due diligence instead of jumping straight into filming.

Do Your Homework
Make sure that you read the rules and judging criteria carefully. Knowing how a winner will be chosen will help you make a video that will fit the bill.

Scripting and Story Line
Having a good story is key, so take the time to brainstorm until you have a story you are confident in. You want a moving story that fits in with the contest theme and connects with the viewer. Humor is often one way to draw people in, but it isn't always easy to pull off and certainly isn't the only option. You can tug at the heartstrings or appeal to people's sense of justice, etc. The goal is always to create a story people will want to watch through to the end.

Practice and Timing
Since you will almost always have a time limit, you need to make sure you can take your story from beginning to end in the time allowed. With a limited amount of time, subplots and tangents should be scrapped, and you need to grab your audience in the beginning. You want to start with a strong hook, and keep things moving through the conclusion. When reading through your script and practicing, you should not only make sure you are familiar with the dialogue, working on making it sound natural and animated, you should also be testing how long it takes to read through. Does it fit within the video time limitations? As you go through this process you should think about if there are any awkward phrases you should remove, or other edits to either cut down the length or help with the rhythm of your story and keep things moving forward.

Sponsors
Depending on who is sponsoring the contest you may want to try to work them into your video. Maybe use one of their products as a prop or have it in the background. If they are doing the judging this could earn you some brownie points, but don't force it if it really doesn't make sense with your story.

Dialogue and Audio
Audio quality in your video matters. It is an important part of a film as a whole, and poor audio can detract from a film and cause people to lose interest, so don't forget about the audio. Dialogue should sound natural and animated, which can be a challenge both in writing and performing, as well as in the recording. You should strongly consider using an external microphone for recording high-quality audio. You want the dialogue to be easy to hear and understand and have a consistent volume between shots.

If you do use the built-in microphone on your camcorder remember you can still separate the audio from the video so you clean the audio, remove background noise, normalize and make other adjustments. For a closer look at some important audio editing features, you may want to use, see our list of WavePad audio editing tips and tricks.

Adding Music
Adding music to your soundtrack can help draw the audience in, but be sure to balance the volume with any dialogue. And make sure that you either get permission before using copyrighted music from the publisher or steer clear of copy-protected music altogether and use royalty-free music and original works. You may be required to provide proof of copyright/permission for the audio in your video with your submission; using copyrighted music without permission can not only get your video disqualified, but it can also cause legal problems, so getting and sending proof of permission for a piece of music is in your best interests.

Filming and Editing
Important things to remember are that you want to maintain sharp focus and limit the amount of zooming and camera movement. Consider using a tripod during filming. Shaking can be removed from video using video stabilization, and if you are using handheld camcorders or cell phones this will be a necessary step, but using a tripod will eliminate the need for stabilization in editing.

For a closer look at some more VideoPad editing features you may want to use, see our post on video editing tips and tricks, but remember you want to entertain the audience, not to make them nauseous. Excessive camera movement or overdoing the effects can be distracting, and like everything else you want the transitions and movement to support the story, not draw attention to itself.

Double Check Everything
Before you send in your video be sure to double-check everything. Did you follow all of the guidelines? Is the movie saved in the correct format and does it meet the time requirements? After all of the work you put in it, you don't want to have your video thrown out because you forgot something. If you will be submitting your video on a DVD, do not include menus unless they were asked for. The judges will be watching hundreds of entries, so this is another case where time matters and they will want the video to start playing automatically.

Submit Your Video
When you're sure you have dotted all your i's and crossed all your t's send in your submission. If it is being judged by the community be sure to let your friends, family, and colleagues know to check it out and vote for you, otherwise it will now be out of your hands. But win or lose, you should have a video you are proud of.

If you have any more advice to share please comment, and Good Luck with your videos!

Monday, April 8, 2013

WavePad Audio Editing Tips & Tricks

WavePad Audio Editing Software Tips and Tricks
Below you will find a compilation of some of the audio effects and sound editing basics for the WavePad audio editor that you will want to know and test out for yourself as you delve into the world of audio editing. Another great way for those new to audio editing to get started is by watching the WavePad sound editor intro video tutorials so you can see the audio editor in action.

Split and Cut Audio Files
You can split a file at any point you choose by simply clicking the Split button on the Edit tab. This will create two audio files split at the point you had the cursor. Be careful when you use this function, the action cannot be undone. Additional audio splitting options include splitting at bookmarks, splitting at silences and similar Trim options that delete sections instead of creating new audio files.

Amplify Audio Volume
To make the audio sound louder, instead of simply turning the volume control up you want to amplify the file. You will find Amplify on the Effects tab, which will open a window where you can either adjust the amplification using the slider or by selecting a preset level from the drop-down menu. Selecting 200% will double the volume, 50% will cut the volume in half.

Equalize Audio
Amplifying affects the full spectrum of the audio in a file, but if you want to increase or decrease certain frequencies, for example, boosting all of the lower bass frequencies, then you want to use the Equalizer. The Equalizer is also on the Effects tab and opens a graph of the frequencies going from low to high frequencies as you move left to right. This gives you very finite control of the frequency ranges you want to control. Moving a point up will make the frequency stronger and moving a point down will make it weaker.

Normalize Audio
Normalizing an audio file is similar to amplifying, except that normalizing increases the sound of the loudest peak to the maximum level without causing clipping in digital audio. This is frequently used as the last step before saving a final version of an edited song or recording. To normalize an audio file, you will find Normalize on the Effects tab.

Fade In and Out of Audio
Fading in and out of an audio file will help acclimate the ear to the background noise of a file. To fade in, select a region at the beginning of your file, then select "Fade in" under Fade on the Effects tab. Similarly, you can select "Fade out" with a region at the end of your file selected. A good tip is to fade in quicker than you fade out because the ear expects to hear the initial audio quickly, but abrupt transitions to silence at the end can be jilting.

Remove Background Noise
Since not every audio recording is made in a sound studio environment, you often get unwanted background noise in recordings. To remove background noise you want to take advantage of the Cleanup options on the Effects tab. Specifically, under Noise Reduction try using Audio Spectral Subtraction and then Multi-band noise gating. If the presets don't give the results you want, try using lower levels on these reductions until you find a combination that leaves only audio you want to keep.

Remove Vocals
You will find an option to Reduce Vocals under the Voice button on the Effects tab. This will open a dialog box that allows you to change the pan position and width, the vocal level, and preserve the bass. Generally, the default settings will work the best, but different songs may require different settings to effectively reduce or eliminate the vocal frequencies, so if you don't get the results you want, try adjust these settings until you are satisfied with the result.

Layer Audio & Voiceovers
WavePad won't allow you to record directly over another file; highlighting a file and clicking record will replace the selection. Depending on how much mixing you want to do, you may want to consider moving to MixPad audio mixing software, but for some basic audio mixing within WavePad, you want to use the Paste Mix feature. Copy the audio you want to add to your file to the clipboard, then select all in the file you want to add it to, then select Paste Mix on the Edit tab. This will open a window with options on what to do if your files are not the same length. When you click OK the two pieces of audio will be combined.

Sound Effect Library
Find audio clips and sound effects to add to your audio projects in the NCH Sound Effect Library. Open the Sound Library from the Tools tab. This opens a new window where you can preview and download sound effects and royalty-free music clips.

Audio Effect Plugins
In the Windows version of WavePad, you can add DirectX and VST plugin effects to further expand your audio editing capabilities. Find the options to add and use VST and DirectX plugins on the Effects Tab. VST Plugins will open their own interface where you can adjust the settings, while you will need to go into the settings when selecting a DirectX plugin for the effect to be applied when you click OK. Get started with this list of free VST plugins you can download and use with WavePad.

FFT Sound Analysis
All of the audio editing features outlined above are all easy to put into action, but don't let that fool you into thinking that WavePad doesn't have a lot of power under the hood. One of the more advanced areas you can explore is the powerful audio analysis tools for examining the spectral content of the audio. Learn about the FFT and TFFT audio analysis graphs and what they represent to start to get your feet wet. These tools can be used in many fields, including linguistics and mathematics, in addition to sound engineering.


If you have any other tips, favorite features, or advice of your own, please comment and share them below.

Monday, June 25, 2012

Remove Background Noise from Audio with WavePad

If you have ever made an audio recording where there are a lot of things going on, like recording an interview at coffee shop, or meetings and lectures with lots of people in the room, you are probably quite familiar with the unwanted background noise that will be a part of your audio when you go back to listen. Sometimes just having a lower quality microphone will add to this background noise, even when you are in relatively quiet surroundings. But the good news is that WavePad audio editor provides an easy way to remove this unwanted noise so you don't need to move all your recording into a studio to get a crisp sounding file. removing background noise and cleaning up audio files is easier than you might think.

To remove background noise, load your audio file into WavePad.
  1. On the Effects tab, click the Cleanup button and select Noise Reduction, Audio Spectral Subtraction. Click the preset drop-menu and select voice or music, then click OK to apply.
  2. Then again from the Effects tab, click the Cleanup button and select Noise Reduction, Multi-band noise gating. Select a preset, then click OK to apply.
Remove Background Noise from Audio Recordings with WavePad

If the presets aren't giving you the best results, try using lower levels on each type of reduction until you find a combination that leaves you with just the audio that you want to hear. Download WavePad audio editing software today to try the noise reduction feature for yourself.