Showing posts with label editing. Show all posts

Thursday, October 31, 2013

MIDI Recording and Editing

midi software recording, editing and mixing Did you know that built into our MixPad multi-track recording and mixing software is a MIDI editor that gives you precise control of MIDI tracks?

What this means is that you can record from MIDI instruments and devices, then edit those tracks, adding or deleting notes, adjust the pitch and duration of notes. Even quantize and humanize your MIDI creations adding small amounts of variability to the track so it sounds less like a robot and more like a musician. All of this with support for VSTi instruments and the standard MixPad features giving you the ability record and mix multiple audio tracks, add audio effects and more, expanding the power of this comprehensive sound studio software.

Thursday, October 3, 2013

Video Editing On The Go - VideoPad For Android Is Here

In May 2013, YouTube celebrated its 8th anniversary announcing that 100 hours worth of video is uploaded every minute—that's four days worth of video every minute! And YouTube isn't the only place to upload videos, there are lots of other sites to upload videos of our children, pets, vacations or just about any aspect of our daily lives.

A lot of us shoot videos in all kinds of locations and don't want to wait to get home to our computers to edit that video. We want to share that video with our family and friends as soon as possible.

With VideoPad for Android, NCH Software has made it incredibly easy to edit and enhance videos while on-the-go. This new release for Android lets you take advantage of all the powerful video recording and editing tools you have come to love, from the convenience of your Kindle or Android tablet.

VideoPad Android Video Editing App

With VideoPad for Android it's easier than ever to create top-quality videos and have the instant gratification of sharing your videos in record time.

VideoPad Movie & Video Editor for Android lets you record or import video from your tablet and get straight to editing instead of waiting to get to a computer. VideoPad includes features to fine-tune the brightness and color of videos and add other visual effects. You can rotate videos that were recorded at different orientations so their perspectives match. You can trim videos down to size, zoom in on clips, add music, narration, video effects, transitions and complete all edits quickly and easily.

Even though VideoPad for Android has only just been released it's already getting four- and five-star reviews on the Google Play app store, and we are certain you will love it too. If you're already shooting and editing lots of video, or if you're just getting started, VideoPad for Android tablets is one app you won't want to miss. Install it today to create videos you'll be proud to share from wherever you are.

Saturday, July 13, 2013

Recording A Video Audition

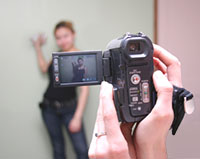
Record Video Audition Tape and Contest Entries From becoming a YouTube star to entering contests held by talk shows, to sending in a video audition to become a game show contestant or star of a reality tv show, opportunities to use videos to help you find your fifteen minutes of fame are all around you. But with video recording and editing technology so prevalent, there is also a huge amount of competition. So, it is important to make a lasting impression with what limited time that you have.

To help make sure you shine in your audition roles, here is some advice for creating an audition tape for all of our VideoPad video editor users and friends.

Eliminate Distractions
Many of the tips for entering video contests we mentioned back in May can apply to video entries to other types of competitions as well, but instead of selling a story, you are going to be selling yourself. And instead of editing a script to cut out anything not important to the central story, you will instead need to cut out things that could distract the judges from that star of this short film—you. Most of the advice below is centered on this idea of eliminating distractions, so if you don't take anything else away just remember that you want to keep people's attention on you.

Planning and Preparation
Creating a video of yourself certainly sounds a lot easier, you don't need to craft a storyline, but that doesn't mean you should skip straight to filming. Read over the rules/requirements. What do you need to include? What are they looking for?

While you may not be writing out the story you may still want to write yourself a script or dot points to practice from; like you might use if you were giving a speech. Let's face it, you may not have a big audience while the camera is rolling, but if you do your job well there could still be a large audience who watch your video later on.

Practice, Practice, Practice
Remember practice makes perfect, so practice, practice, practice. While writing out notes when you're getting ready will help you prepare, you don't want to stand in front of the camera reading from a piece of paper. Make sure you know what you want to cover in and out. Don't be afraid to film multiple takes and pay particular attention to filming and editing below to make sure you have a clean video to send in.

Be Yourself
Filming multiple times may also help you get any camera-shy nerves out of your system. You need to know what you want to say which is where the practice will help, but those nerves can sometimes make you stiff. Practice several times with the camera rolling to help you feel natural even with the red light on so that people will still see you and your personality, not just a robot regurgitating a script. It may be easier for some, but you want to come across as genuine.

Location, Location, Location
One thing that can hurt your chances but is easy to control is the setting. With few exceptions, you want to avoid a cluttered backdrop that could distract people away from you. Try recording in front of a plain backdrop like a white wall or a solid-colored door. You can also consider filming at a nice outdoor location, but remember that focus should be largely on you so you want to avoid areas where there will be distracting sounds or commotion like traffic or people walking by. Filming outdoors could also make getting clear audio a bigger challenge depending on your device(s), so be prepared to need to do some audio editing with WavePad in addition to working with VideoPad.

Polish With a Little Video Editing
Editing your video shouldn't be an arduous task. The point of editing is just to polish off what you have already done. Cut out mistakes; make sure you are meeting any time requirements. Maybe add in a photo or two, but don't be tempted to use every effect at your disposal. Any editing you do should be to help you talk about and sell yourself. Keeping it simple is in your best interest.

For some help getting started and learning the simple editing basics, see our post on video editing tips and tricks and the VideoPad video tutorial.

Hopefully, these tips will help you stay focused as you record and edit your video audition tapes. Most importantly have fun and good luck!

Friday, July 5, 2013

New Book: Video Editing with NCH VideoPad for Dummies

video editing with videopad for dummies There is a new way to learn how easy video editing can be. Now at Best Buy you can find Video Editing with NCH VideoPad Software for Dummies. If you, or someone you know, is intimidated by the thought of sitting down and trying to edit your home movies, this book is the answer. Coming with a copy of VideoPad you can install on your Windows or Macintosh computer it will guide you through the editing process with all the tips and tricks you would expect from any for Dummies publication.

Friday, May 24, 2013

WavePad Now Available for Android

WavePad Android Audio Editing App The long time NCH favorite, WavePad Sound Editor, is now available for Android phones and tablets. With releases of the popular, easy-to-use audio editor already available for Windows, Mac, iPhone and iPad we are extremely excited to round things off with the Android version.

Like the other versions, the WavePad Audio Editing Android App provides the same easy audio recording and editing tools you want, simply on another platform. So no matter what your preferred operating system is, or if you are at the desk or on the road, audio enthusiasts everywhere can rely on WavePad Audio Editing Software to be there to record and edit music, interviews and other audio.

Wednesday, May 15, 2013

Create a Panorama with Photo Stitching

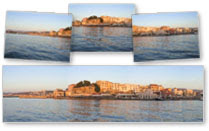
Panoramic Photo Stitching Software If you don't have a panoramic camera, you can still make panoramic photos by stitching several photos together. To successfully create a panorama you will need to take two—or more—pictures that overlap. Photo stitching software will need to scan the images to find points that match up in order to fit them together. A good rule of thumb is to take the pictures so that about a fourth of width overlaps other images.

For the best results, in addition to making sure the images overlap you also want to be sure you don't move or change any camera settings like the zoom, between the pictures in the panorama series. Changing your position or other settings will make it difficult, if not impossible, to stitch the photos together.

When you have photos ready to be stitched together open PhotoPad photo editing software and select Panorama on the Tools tab. This will open the Create Panoramic Image dialog where you can Add all of your overlapping photos and arrange them in order in the top preview window. When all of the photos have been added and are in the right order, you can click Update Panorama to stitch together a preview of the panoramic image. If you add or delete any source images the panorama will be deleted. When you are happy with the results in the panorama preview simply click OK and a new project will be created for the panoramic photo.

Note making panoramic images is a resource intensive process, so it can take a long time, and uses a lot of memory. If your computer runs out of memory, try scaling down the images, or using fewer photos.

Wednesday, May 8, 2013

Video Competition Tips & Advice

VideoPad Video Editing for Video Competitions Ready to take your videos beyond home movies? For VideoPad users who are ready to showcase their creativity and videographer skills, we've put together some advice and resources for getting your videos ready to compete.

There is a wide range of video contests out there, put on by all kinds of companies and products, in a variety of themes. The smaller contests will have smaller prizes, but they will also have less competition, so they are still worth considering. To find a contest that appeals to you here are a few sites to explore: Once you have a contest picked out the real work starts. Be sure to take your time and do your due diligence instead of jumping straight into filming.

Do Your Homework
Make sure that you read the rules and judging criteria carefully. Knowing how a winner will be chosen will help you make a video that will fit the bill.

Scripting and Story Line
Having a good story is key, so take the time to brainstorm until you have a story you are confident in. You want a moving story that fits in with the contest theme and connects with the viewer. Humor is often one way to draw people in, but it isn't always easy to pull off and certainly isn't the only option. You can tug at the heartstrings or appeal to people's sense of justice, etc. The goal is always to create a story people will want to watch through to the end.

Practice and Timing
Since you will almost always have a time limit, you need to make sure you can take your story from beginning to end in the time allowed. With a limited amount of time, subplots and tangents should be scrapped, and you need to grab your audience in the beginning. You want to start with a strong hook, and keep things moving through the conclusion. When reading through your script and practicing, you should not only make sure you are familiar with the dialogue, working on making it sound natural and animated, you should also be testing how long it takes to read through. Does it fit within the video time limitations? As you go through this process you should think about if there are any awkward phrases you should remove, or other edits to either cut down the length or help with the rhythm of your story and keep things moving forward.

Sponsors
Depending on who is sponsoring the contest you may want to try to work them into your video. Maybe use one of their products as a prop or have it in the background. If they are doing the judging this could earn you some brownie points, but don't force it if it really doesn't make sense with your story.

Dialogue and Audio
Audio quality in your video matters. It is an important part of a film as a whole, and poor audio can detract from a film and cause people to lose interest, so don't forget about the audio. Dialogue should sound natural and animated, which can be a challenge both in writing and performing, as well as in the recording. You should strongly consider using an external microphone for recording high-quality audio. You want the dialogue to be easy to hear and understand and have a consistent volume between shots.

If you do use the built-in microphone on your camcorder remember you can still separate the audio from the video so you clean the audio, remove background noise, normalize and make other adjustments. For a closer look at some important audio editing features, you may want to use, see our list of WavePad audio editing tips and tricks.

Adding Music
Adding music to your soundtrack can help draw the audience in, but be sure to balance the volume with any dialogue. And make sure that you either get permission before using copyrighted music from the publisher or steer clear of copy-protected music altogether and use royalty-free music and original works. You may be required to provide proof of copyright/permission for the audio in your video with your submission; using copyrighted music without permission can not only get your video disqualified, but it can also cause legal problems, so getting and sending proof of permission for a piece of music is in your best interests.

Filming and Editing
Important things to remember are that you want to maintain sharp focus and limit the amount of zooming and camera movement. Consider using a tripod during filming. Shaking can be removed from video using video stabilization, and if you are using handheld camcorders or cell phones this will be a necessary step, but using a tripod will eliminate the need for stabilization in editing.

For a closer look at some more VideoPad editing features you may want to use, see our post on video editing tips and tricks, but remember you want to entertain the audience, not to make them nauseous. Excessive camera movement or overdoing the effects can be distracting, and like everything else you want the transitions and movement to support the story, not draw attention to itself.

Double Check Everything
Before you send in your video be sure to double-check everything. Did you follow all of the guidelines? Is the movie saved in the correct format and does it meet the time requirements? After all of the work you put in it, you don't want to have your video thrown out because you forgot something. If you will be submitting your video on a DVD, do not include menus unless they were asked for. The judges will be watching hundreds of entries, so this is another case where time matters and they will want the video to start playing automatically.

Submit Your Video
When you're sure you have dotted all your i's and crossed all your t's send in your submission. If it is being judged by the community be sure to let your friends, family, and colleagues know to check it out and vote for you, otherwise it will now be out of your hands. But win or lose, you should have a video you are proud of.

If you have any more advice to share please comment, and Good Luck with your videos!

Thursday, May 2, 2013

A WavePad Audio Editor Pre-Download Preview

Once again thanks to CNET you can take a short "video tour" of some of the wonderful features that make WavePad audio editor such a favorite for editing all kinds of audio. This is just a quick peek at the program, remember that you can also check out our list of audio editing tips and tricks to get started and watch our series of WavePad video tutorials for some more in depth instructions via video.

Monday, April 8, 2013

WavePad Audio Editing Tips & Tricks

WavePad Audio Editing Software Tips and Tricks
Below you will find a compilation of some of the audio effects and sound editing basics for the WavePad audio editor that you will want to know and test out for yourself as you delve into the world of audio editing. Another great way for those new to audio editing to get started is by watching the WavePad sound editor intro video tutorials so you can see the audio editor in action.

Split and Cut Audio Files
You can split a file at any point you choose by simply clicking the Split button on the Edit tab. This will create two audio files split at the point you had the cursor. Be careful when you use this function, the action cannot be undone. Additional audio splitting options include splitting at bookmarks, splitting at silences and similar Trim options that delete sections instead of creating new audio files.

Amplify Audio Volume
To make the audio sound louder, instead of simply turning the volume control up you want to amplify the file. You will find Amplify on the Effects tab, which will open a window where you can either adjust the amplification using the slider or by selecting a preset level from the drop-down menu. Selecting 200% will double the volume, 50% will cut the volume in half.

Equalize Audio
Amplifying affects the full spectrum of the audio in a file, but if you want to increase or decrease certain frequencies, for example, boosting all of the lower bass frequencies, then you want to use the Equalizer. The Equalizer is also on the Effects tab and opens a graph of the frequencies going from low to high frequencies as you move left to right. This gives you very finite control of the frequency ranges you want to control. Moving a point up will make the frequency stronger and moving a point down will make it weaker.

Normalize Audio
Normalizing an audio file is similar to amplifying, except that normalizing increases the sound of the loudest peak to the maximum level without causing clipping in digital audio. This is frequently used as the last step before saving a final version of an edited song or recording. To normalize an audio file, you will find Normalize on the Effects tab.

Fade In and Out of Audio
Fading in and out of an audio file will help acclimate the ear to the background noise of a file. To fade in, select a region at the beginning of your file, then select "Fade in" under Fade on the Effects tab. Similarly, you can select "Fade out" with a region at the end of your file selected. A good tip is to fade in quicker than you fade out because the ear expects to hear the initial audio quickly, but abrupt transitions to silence at the end can be jilting.

Remove Background Noise
Since not every audio recording is made in a sound studio environment, you often get unwanted background noise in recordings. To remove background noise you want to take advantage of the Cleanup options on the Effects tab. Specifically, under Noise Reduction try using Audio Spectral Subtraction and then Multi-band noise gating. If the presets don't give the results you want, try using lower levels on these reductions until you find a combination that leaves only audio you want to keep.

Remove Vocals
You will find an option to Reduce Vocals under the Voice button on the Effects tab. This will open a dialog box that allows you to change the pan position and width, the vocal level, and preserve the bass. Generally, the default settings will work the best, but different songs may require different settings to effectively reduce or eliminate the vocal frequencies, so if you don't get the results you want, try adjust these settings until you are satisfied with the result.

Layer Audio & Voiceovers
WavePad won't allow you to record directly over another file; highlighting a file and clicking record will replace the selection. Depending on how much mixing you want to do, you may want to consider moving to MixPad audio mixing software, but for some basic audio mixing within WavePad, you want to use the Paste Mix feature. Copy the audio you want to add to your file to the clipboard, then select all in the file you want to add it to, then select Paste Mix on the Edit tab. This will open a window with options on what to do if your files are not the same length. When you click OK the two pieces of audio will be combined.

Sound Effect Library
Find audio clips and sound effects to add to your audio projects in the NCH Sound Effect Library. Open the Sound Library from the Tools tab. This opens a new window where you can preview and download sound effects and royalty-free music clips.

Audio Effect Plugins
In the Windows version of WavePad, you can add DirectX and VST plugin effects to further expand your audio editing capabilities. Find the options to add and use VST and DirectX plugins on the Effects Tab. VST Plugins will open their own interface where you can adjust the settings, while you will need to go into the settings when selecting a DirectX plugin for the effect to be applied when you click OK. Get started with this list of free VST plugins you can download and use with WavePad.

FFT Sound Analysis
All of the audio editing features outlined above are all easy to put into action, but don't let that fool you into thinking that WavePad doesn't have a lot of power under the hood. One of the more advanced areas you can explore is the powerful audio analysis tools for examining the spectral content of the audio. Learn about the FFT and TFFT audio analysis graphs and what they represent to start to get your feet wet. These tools can be used in many fields, including linguistics and mathematics, in addition to sound engineering.


If you have any other tips, favorite features, or advice of your own, please comment and share them below.

Tuesday, March 19, 2013

Audio Effect Plugins for WavePad Sound Editor

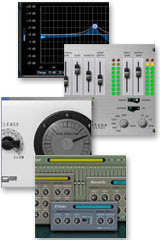
In addition to the wide range of audio editing features and effects built into WavePad Audio Editor, you can also add plugins to further expand your Audio Editing possibilities. WavePad supports both DirectX and VST plugin effects, providing access to thousands of additional audio tools and effects.

VST Plugins
WavePad VST and DirectX Audio Effect Plugins VST or Virtual Studio Technology, is a standardized way of adding effects to digital audio editing programs like WavePad. To add a VST effect to WavePad choose VST on the Effects tab, which will open the VST plugins window. In this window browse to the directory on your computer where you have saved your VST plugins (note that the plugins must be DLL files). When you have a folder selected, the list of VST effects in that directory will populate the VST Plugin list, so you can use the drop down list to select your plugin. When you click OK, the VST plugin will open in WavePad and you can make any adjustments to its parameters and continue to edit the waveform, but now the audio you hear is being processed by the VST effect. To save the effect, click the Apply button on your effect which will close the effect and save the audio with the effect added.

DirectX Effects
Similar to VST, DirectX plugins are another standardized way to connect audio synthesizers and effects to audio editors. These plugins do not have their own interfaces, but pass and process the audio behind the scenes. Also, as with the VST plugins, you will find DirectX on the Effects tab, and clicking on it will open a window with a list of the DirectX plugins detected on your computer. Select the effect you want from the drop down menu and click Settings to make changes to the configuration settings, and click the OK to apply the DirectX effect to your audio.

There is a world of extra effects out there that you can use when you start exploring VST and DirectX effects. To get you started we have a list of free VST plugins available online for you to download and try with WavePad, but this is just the beginning. There are lots of other plugins available that you can use with WavePad Audio Editing Software to further enhance your audio editing projects.

Note: currently plugin support is limited to the Windows version of WavePad

Tuesday, March 12, 2013

Adding an Audio Voice Over with WavePad

audio mixing If you want to record a your voice over a piece of music you have two choices in the NCH Software audio suite. MixPad recording and mixing software is the more advanced program, that will allow you to record multiple tracks, and fine tune the mixing of the music and vocal tracks, but you can also try the Paste Mix feature in WavePad audio editor for quickly combining to files.

WavePad doesn't allow you to record directly over another file, highlighting a file and clicking record will end up replacing the selection. Instead, use the Paste Mix feature to combine two audio files into a single track.

Copy the recorded voice over to the clipboard, then select all in the audio file you want to add that voice over to and click Paste Mix on the Edit Tab.This will open a window with options on what to do if your files are not the same length. If the Mix Audio—which is your voice recording on the clipboard—is the shorter of the two files, you can ignore the options and click OK. If the Mix Audio is longer, you need to decide what to do when the audio you are mixing into is finished. When you click OK the two pieces of audio will be combined and when you press Play you will hear both files.

Friday, February 22, 2013

VideoPad: Video Editing Excellence

Excellent video editing software We are very proud of the fact that even though VideoPad hasn't broken into the top three on TopTenReviews' list—yet—they have awarded our video editor for excellence. With each new release, we strive to add more of the advanced features professionals crave, and just as importantly stay easy to use. That user-friendly quality that allows everyone to make movies is in a large part what TopTenReviews has noticed and is recognizing:

"Using VideoPad requires little effort. Before we even looked at the manual, we were able to create a video. To add transitions, effects and more, all you have to do is drag and drop them in place ... Overall, VideoPad has some excellent features. It can import files directly from many types of devices and it has 3D and green-screen capabilities. It is easy to use and has basic editing tools."
    –  TopTenReviews

If you haven't tried VideoPad video editing software yet, why not download a copy today. We think you will agree that VideoPad is both an excellent and easy video editor. Those of you who are already VideoPad users remember you can always send us suggestions on how we can make VideoPad even better. With your help, those other video editors better watch out, because we plan to keep moving VideoPad forward and raising the bar on video editing excellence.

Saturday, February 2, 2013

Make "Picture-in-Picture" Videos with VideoPad

Create picture in picture video with videopad for pip video editing The picture-in-picture (PIP) effect is commonly used in videos where more than one set of images is shown simultaneously in order to tell a story or convey additional information. Picture-in-picture is frequently used as part of news clips and in instructional videos.

The PIP effect can easily be achieved using VideoPad Video Editor software (version 3.0) by adding the video clip you want to overlay as your picture-in-picture onto the timeline so that it is positioned above the video you want to serve as the background in your video.

With this clip selected in the timeline, click on the "Effects" button then choose "Motion" from the drop-down menu at the top of the dialog box. Use the "Scale," "Position X" and "Position Y" controls to adjust the size and placement of your clip. You will be able to see the position and size change in the preview window on the right side of the Effects dialog box.

When everything is positioned the way you want it simply close the dialog box to apply your changes. Then, when you preview your movie, you will see your re-sized and re-positioned video clip overlaid on top of the larger clip.

Creating a picture-in-picture video in VideoPad is that easy. Use the same process to position images on the screen, making it an easy way for businesses to add their logo to videos.

Monday, October 8, 2012

Something to Talk About

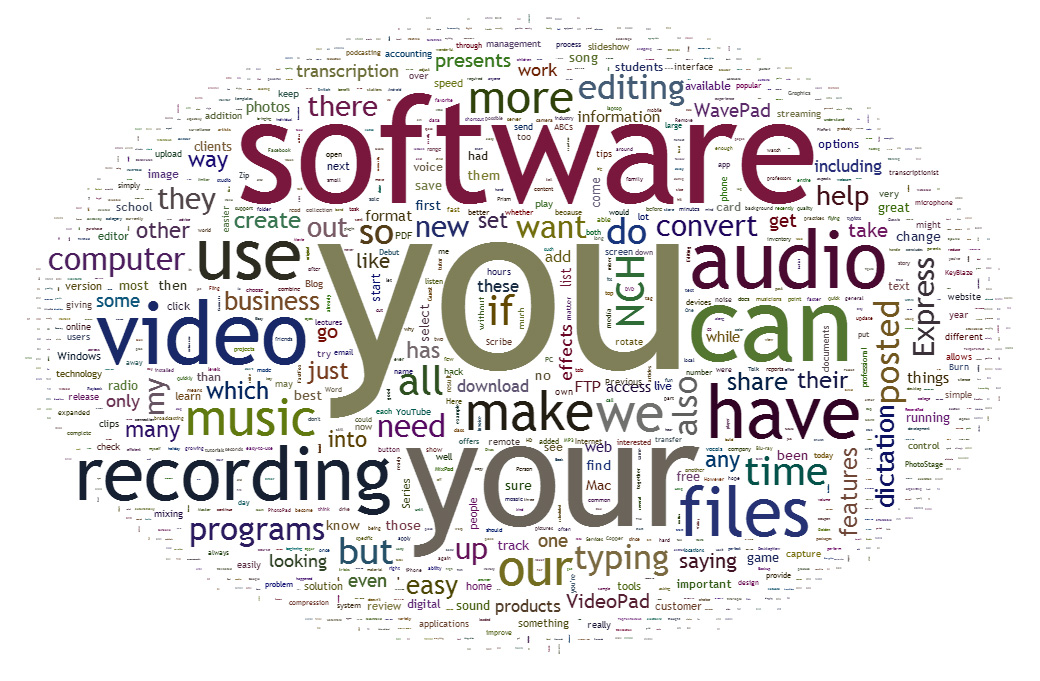
Below is a word cloud generated from our posts here on the NCH Software: Do More with Software blog. There is no real surprise that we talk a great deal about "you" and "software," but is there anything you would like us to write about and cover more in the future?

NCH Software blog word cloud

Monday, June 25, 2012

Remove Background Noise from Audio with WavePad

If you have ever made an audio recording where there are a lot of things going on, like recording an interview at coffee shop, or meetings and lectures with lots of people in the room, you are probably quite familiar with the unwanted background noise that will be a part of your audio when you go back to listen. Sometimes just having a lower quality microphone will add to this background noise, even when you are in relatively quiet surroundings. But the good news is that WavePad audio editor provides an easy way to remove this unwanted noise so you don't need to move all your recording into a studio to get a crisp sounding file. removing background noise and cleaning up audio files is easier than you might think.

To remove background noise, load your audio file into WavePad.
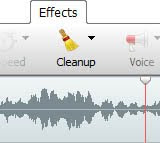
  1. On the Effects tab, click the Cleanup button and select Noise Reduction, Audio Spectral Subtraction. Click the preset drop-menu and select voice or music, then click OK to apply.
  2. Then again from the Effects tab, click the Cleanup button and select Noise Reduction, Multi-band noise gating. Select a preset, then click OK to apply.
Remove Background Noise from Audio Recordings with WavePad

If the presets aren't giving you the best results, try using lower levels on each type of reduction until you find a combination that leaves you with just the audio that you want to hear. Download WavePad audio editing software today to try the noise reduction feature for yourself.

Monday, June 18, 2012

WavePad at the Radio Studio

Guest post by Daan Berg

There are many local radio stations in the Netherlands, 285 to be exact. I am a volunteer at one of these stations, where I produce and present a live weekly breakfast-with-news show every Saturday morning.

However, sometimes I need to cheat, when I need to be somewhere else during broadcast hours. Therefore, whenever I can't make a live show, I pre-record it and upload the three hours of material to the control room server, which plays the recordings during my broadcast hours as if I were there, talking live and playing music to my listeners.
Daan Berg
I do my recording in a small studio booth in the cozy building of the combined radio and television station, in which all the professional equipment -- from audio mixers and microphones to professional recorders -- are installed. I can plug my laptop into an outlet of the mixer and start recording, which usually works fine. But recently, things went wrong.

I had just finished recording three hours of great radio with lots of enthusiasm, which one always needs when hosting any kind of show. I opened up WavePad which I always use for audio editing, to cut off the silences at the beginning and end of the files and listen if everything sounded OK. It didn't. What happened?

It turned out the internal sound processor of the audio mixer, the boards full of sliders and knobs you always see in front of radio producers, had its limiter set to a way too aggressive setting. Limiting is the act of bringing the volume of a device down quickly when it's too loud. For instance, you will notice that if you bring a microphone close to your mouth and shout into it, you will hear that your speakers can't cope. However, radio hosts shout into microphones from time to time. On the radio, it is very rare to hear this, as the limiter in the control room will automatically pull the volume of the microphone down to make sure no gear is damaged and to make the sound more enjoyable.

However, a limiter can also be set too aggressive. Instead of only pulling down peaks that go above a certain maximum level, a limiter can also see every peak as a peak that's too loud. The result: a recording with terribly annoying volume changes every tenth of a second, like someone is heavily abusing the volume knob on a radio.

So I was stuck with three hours of material that I couldn't use. Until I remembered that WavePad has an Automatic Gain Control function, which analyses the volume of the audio file and makes adjustments where needed.

It most certainly worked! Of course, the result wasn't perfect yet -- software can never 100% undo what was done with analog equipment -- but when the edited files were played back through the central server, it sounded fine. This had to do with the fact that the control room also sports a compressor, which is a machine that does the opposite of a limiter; it increases the volume when it's too soft.

Thanks to WavePad Audio Editor, I didn't have to start recording all over again. If I had done it all over with my enthusiasm completely gone it would've sounded terrible.


Daan Berg is a local journalist in the Netherlands. He writes for a national newspaper and hosts a weekly breakfast radio show on local radio. He also makes all kinds of media productions, from radio & television items and shows to websites.

Monday, May 21, 2012

How to Remove Vocals in a Song with WavePad

Music Vocal RemoverOne of the most popular features of WavePad audio editing software, is the ability to reduce or remove vocals in a song or a piece of audio. You can use the audio with the vocals removed for karaoke, sampling instruments, remixing music tracks, or simply save as an instrumental version of the song.

To remove vocals, once you have your song loaded into WavePad go to the Effects tab and click the Voice button. Select Reduce vocals from the drop-down menu. This will open a dialog box that will allow you to change the pan position and width, the vocal level, and preserve the bass. Generally the default settings will work the best, but different songs may require different settings to effectively reduce or eliminate the vocal frequencies. If the default settings don't do enough you can adjust these settings until you are satisfied with the result.

If you only want to reduce the vocals on the portion of the audio be sure to select the region first. By default if nothing is selected WavePad will apply the effect to the entire file, so you can skip the selection before choosing reduce vocals to edit the entire song.

Download WavePad music editing software today to try removing vocals from a song to make better background music, your own karaoke songs, or use the new version with a recording of your own singing rendition to mix in.

Wednesday, February 29, 2012

Transcription City Makes Their First Instructional Video

Guest post by Transcription City, specialist transcription services

As most transcriptionists know, NCH Software makes some pretty awesome dictation and transcription software. Most of our transcriptionists use Express Scribe for their transcription work, and it is the programme I always recommend when anyone asks for advice on transcription software because of its simplicity and ease of use with pretty much any audio or video file. At the office, I also use Switch audio file converter from time to time, usually because somebody has sent me a file in an unusual audio or video format. I also use Switch to compress large files, which can save so much time when a transcriptionist needs to download a file for quick turnaround. In my opinion, NCH make some of the best software around, so when we decided to make some instructional videos for our clients, NCH VideoPad was our first choice for video editing.

Watch all the Transcription City videos on YouTube at youtube.com/transcriptioncity
Transcription City is an up-and-coming company, and we want our clients to be able to get to know us as a trusted and professional brand. This is why we came up with the idea of making a few videos to help our clients to get to grips with our website, as well as learn a few tips on recording a high-quality audio or video file. In theory, it was simple: make an informative video and then post it to YouTube. As Company Director, I felt the responsibility should lie on me to introduce potential clients to our company, but the problem was once the camera was pointed at me, I would instantly forget what I was going to say or burst into fits of laughter due to my embarrassment; after all, I’m no Angelina Jolie! We needed a solution so we could cut out the guff and get our point across to our clients clearly and informatively.

Enter VideoPad. After downloading VideoPad from the NCH website (which took us less than a few minutes) we began editing our video. VideoPad was so user friendly that we had a fully edited video in around half an hour, without even watching the tutorials. We were so impressed with the software because we could easily edit and upload video from any camcorder or even an iPhone. VideoPad will accept any video file and it can easily be uploaded to YouTube or transferred to DVD (great if you have made a lot of home movies). You can easily add music or narration, stabilise a shaky video or add photos and captioning to your film.

I can honestly say that by using NCH VideoPad, we have created professional, informative videos that our clients can really benefit from. Now, if we could just get them to arrange George Clooney to star in our next video...

TranscriptionTranscription City offers specialist transcription services to businesses and individuals around the world. They provide a cost effective way of getting work done quickly and faultlessly for large and small companies alike.

Friday, April 22, 2011

Add New Dimension to your VideoPad Projects

Stereoscopic 3D viewing from VideoPad video editorTwo dimensions got you down? Wishing you could add a little something extra to your videos to make them stand out? In addition to new chroma key options, VideoPad now lets you export your finished movie for stereoscopic 3D viewing, yet another example that big things do come in small packages. Simply select the "Stereoscopic 3D" icon at the far right of the "Save Movie" window and set your options below - it's that easy. You'll have several options for stereoscopic output depending on your preference, although the default anaglyph imagery selection is the often the most effective way to produce a stereoscopic 3D.

While you won’t need a fancy new television to view your eye-popping creations, you will need two things: one is a set of 3D glasses with red and blue lenses and the other is a suitable way to view your content. For desktop viewing, I recommend Steroscopic Player. It’s both free and is well suited to view any 3D content you export out of VideoPad.

For more information about VideoPad or any other of our acclaimed video software products, visit www.nchsoftware.com/software/video.html

Thursday, January 20, 2011

MIDI Support Coming to NCH Software

If you’ve ever gone rooting around for MIDI support in the feature lists of NCH Software audio products, you most likely didn’t find it—at the time. But soon you will. A myriad of MIDI features are being added throughout our audio software category.

The most notable example at the moment is in MixPad multi-track mixing software. You can load a MIDI file into MixPad and then double click the clip to edit it. This will launch a MIDI editor dialog that allows you to move notes around, create and delete notes and resize notes on a piano roll. Since a MIDI sequence is really only a set of digital instructions, it’s easier to pinpoint specific notes and alter them than with an audio file:

MIDI editor in MixPad multitrack audio software

The current version of MixPad already features this new MIDI editor. In the future, MixPad will have broader MIDI support, such as allowing users to connect a MIDI capable mixing deck to control the program.

MIDI is starting to play a larger role in all our audio software. Plans to implement the following capabilities are in the works:
  • Playback of MIDI files as music using built in and external synthesizers
  • Record MIDI control sequences
  • Edit MIDI files
  • Control software (e.g., MixPad mixing software or Zulu dj software) with a MIDI device
  • Convert MIDI files to audio
These features will be included in varying combinations in WavePad audio editor, MixPad multi-track mixer, Zulu virtual dj, Switch audio converter, and MIDIPad—a new full-featured MIDI editor currently in development. We’re excited to see how MIDI will contribute to our audio software. How do you think you’ll use it?